Documentation
INTRODUCTION
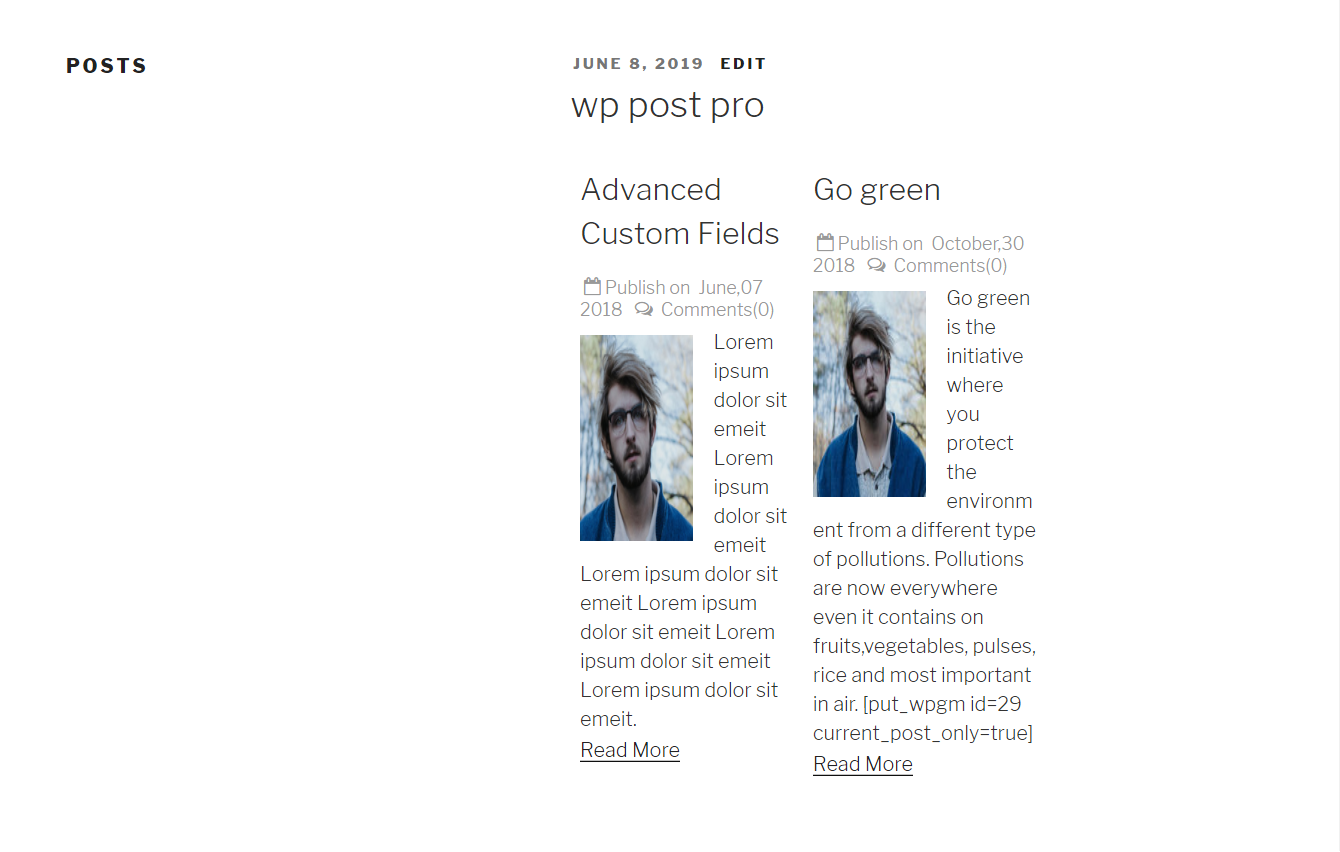
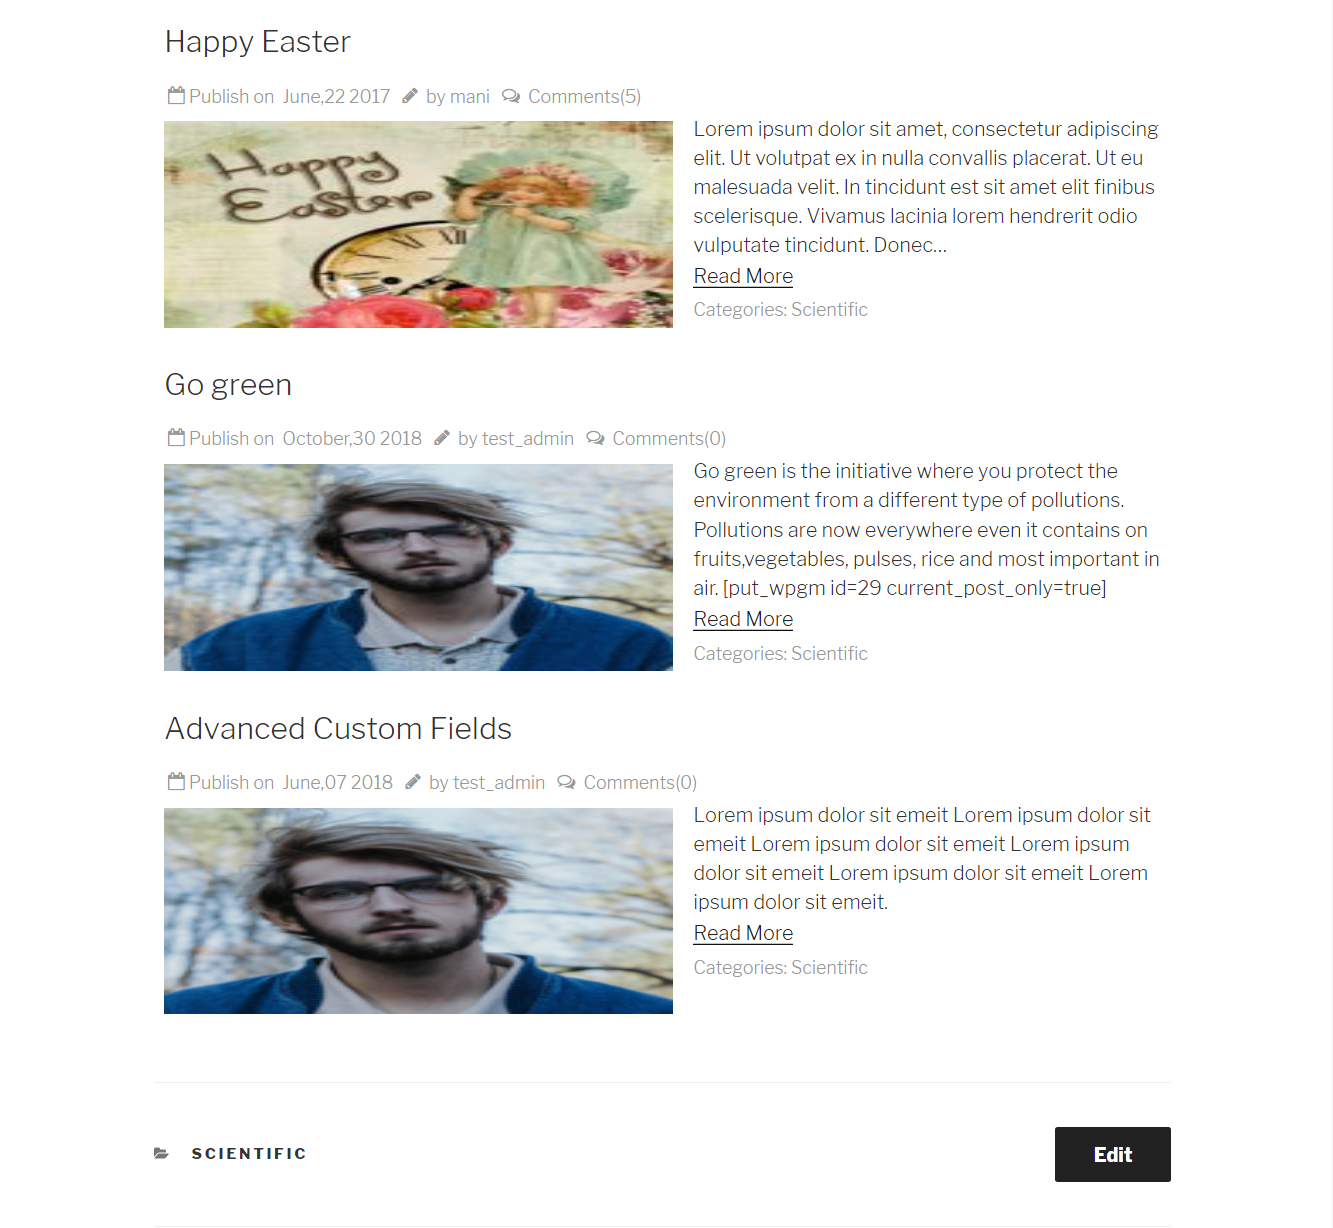
WP Posts is useful plugin to display WordPress posts listing. You can filter posts by using basic to advanced filters options. You can control on title, content, featured image, tags, categories, comments, date and authors as you want. WP Posts plugin is extremely customized with more than 120 settings. The plugin includes a Full-Page Reader and an In-Line one. You can use this to display / list your posts in a nice and compact way.
PLUGIN INSTALLATION
How to install WP Posts pro plugin in wordpress -Step by Step:
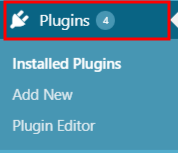
- 1Go to Plugins menu.
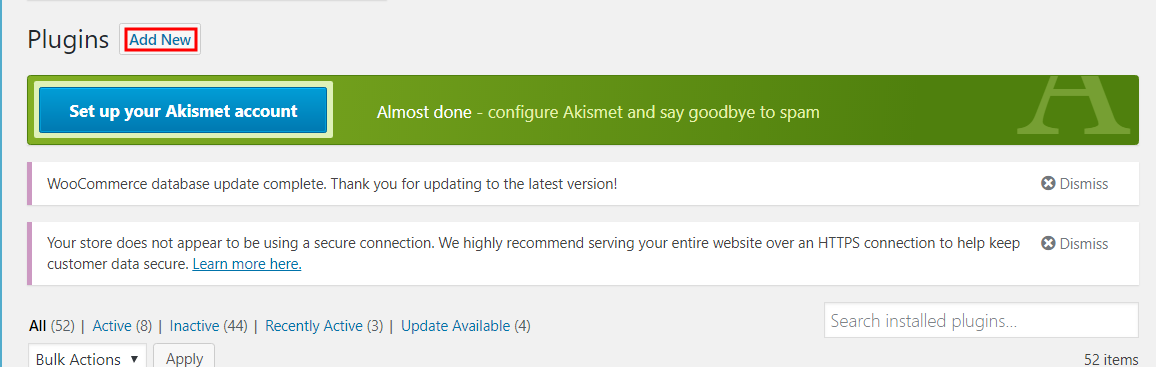
- 2Click on a Add New button.
- 3On top of the page, click “Upload Plugin” button.
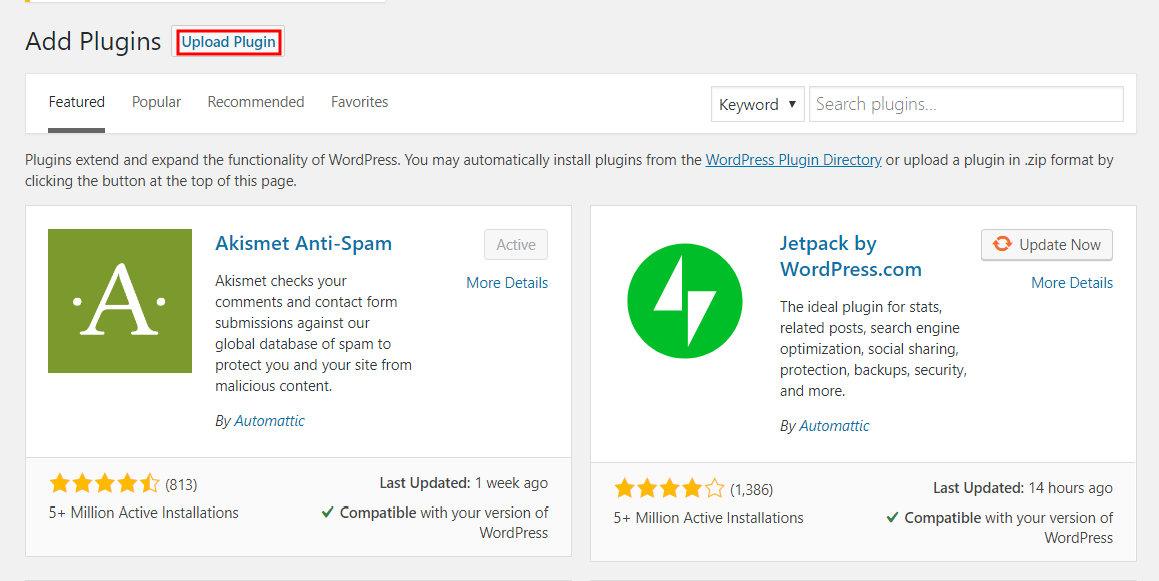
- 4If you have a plugin in a .zip format, click on “Choose File” button
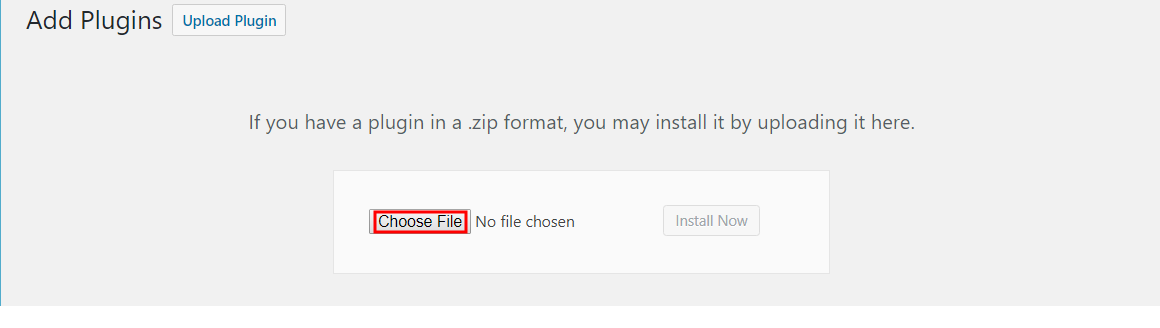
- 5Select the ZIP file from your computer.
- 6Click “Install Now” button.
- 7Wait for a few seconds for wordpress to complete the installation
- 8Click on Activate button.

ADD RULE
- Go to WP post pro ,Click on ADD RULE setting
GENERAL SETTINGS FOR POSTS LISTING RULE
You can display a listing of your all posts/some selected posts by creating a rule.
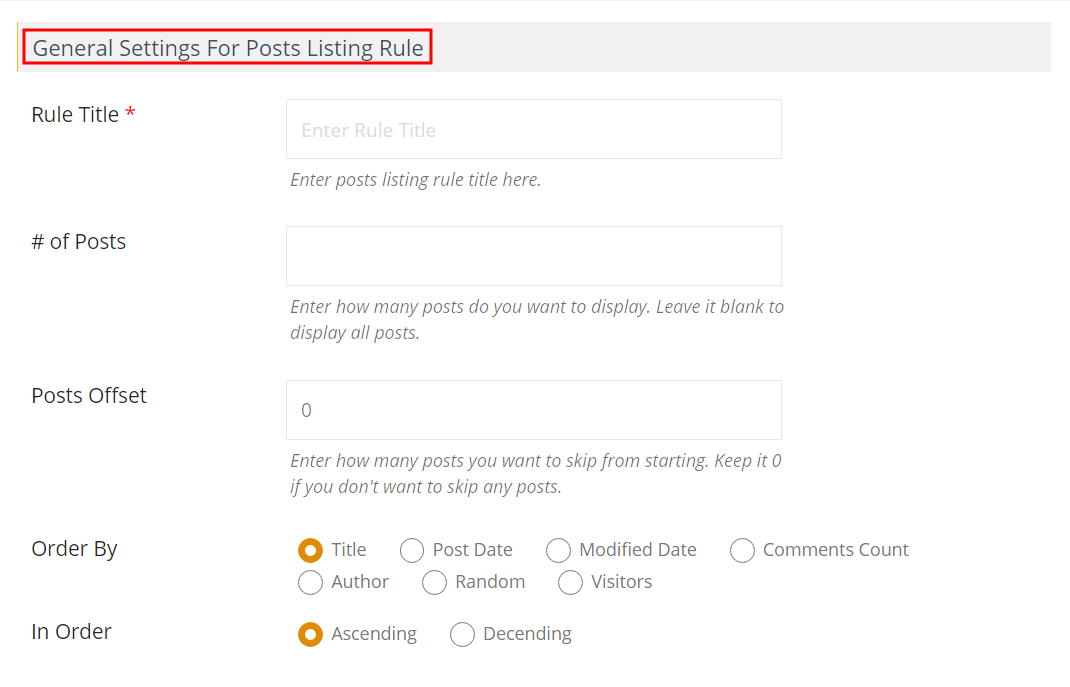
- Rule Title : Insert posts listing rule title here.
- # of Posts : Insert how many posts do you want to display.
- Posts Offset : Insert how many posts you want to skip from starting
- Order By : You can manage your post listing in a proper way it can be according to following:-
Title = Display posts according to title.
Post Date = Display Date of post published.
Modified Date = listing according to post modified date.
Comments Count = listing posts total number comments on particular post.
Author = Display posts listing according to author name.
Random = Display posts listing randomly that were chosen.
Visitor = Display posts most visited by users. - In Order : Display posts listing in Ascending/Descending order.
Ascending order
Descending order

DISPLAY RELATED POSTS
A user wants to display posts only a selected author. It is very easy to apply in the post listing page to display the post of the selected author.
- 1Click on Manage Rules menu of WP Post Pro Plugin, a list of all created rules will appear in new window.
- 2Now click on Edit link to make changes in that rule.
- 3A new page will display scroll down on Display Related Posts
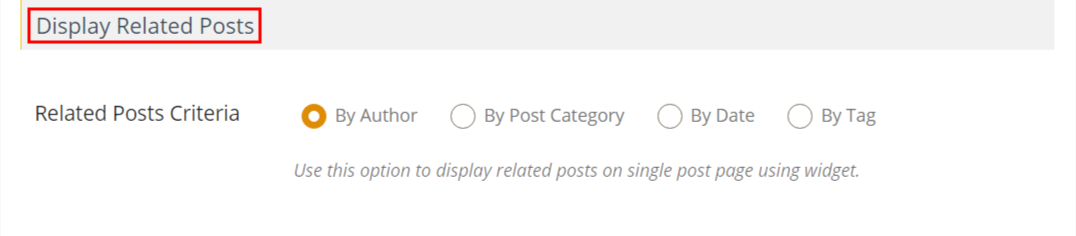
- Related Posts Criteria : You can display related posts in single post page in side bar using widget Author/Category/Date/Tag.
BASIC FILTERS
In most of the times, a user wants to apply some basic filters in post listing, as he wants display post with selected categories. So it is very easy to display a post with selected category and you can display posts in listing according to post ID with the help of a basic filter.
- 1Click on Manage Rules menu of WP Post Pro Plugin, a list of all created rules will appear in new window.
- 2Now click on Edit link to make changes in that rule.
- 3A new page will display scroll down on Basic Filters

- Posts with Featured Image : Tick to show only those posts will display in listing that have featured image.
- Ignore Sticky Posts : Tick to ignore Sticky Posts.
- Author : Selected author to display the post on screen
- Posts Categories : Select Posts Categories to display the post on screen
- Post Formats : Select Post Formats to display the post on screen
- Posts IDs : You can display posts in listing according to post ID.
EXCLUDE POSTS
Sometimes the user does not want to display all posts that were created, he wants to hide/exclude some posts from post listing. You can hide some selected posts form post listing page.
- 1Click on Manage Rules menu of WP Post Pro Plugin, a list of all created rules will appear in new window.
- 2Now click on Edit link to make changes in that rule.
- 3A new page will display scroll down on Exclude Posts
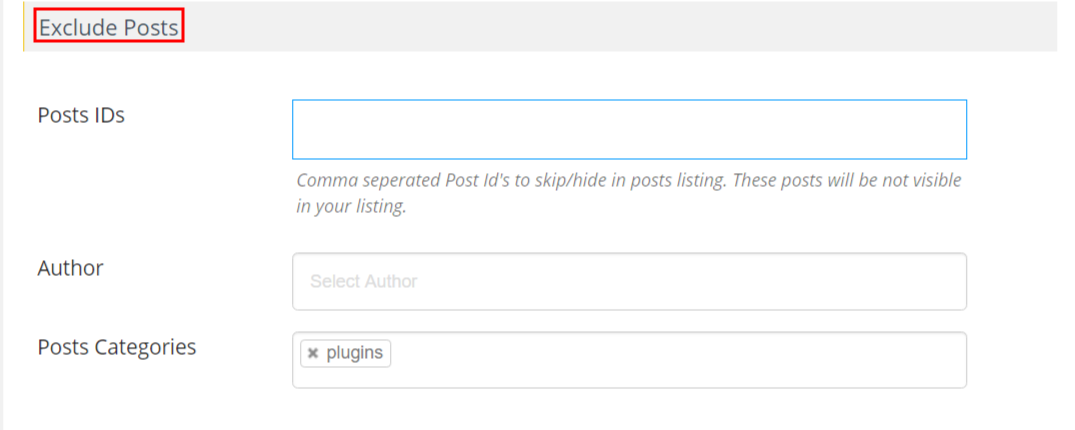
- Posts IDs : Select post Id’s to skip/hide in posts listing
- Author : Select author name whose post you want to hide/exclude.
- Posts Categories : Select Posts Categories.
CUSTOM POST TYPES TAXONOMIES AND TERMS FILITERS
A user can apply custom post type filter in post listing. He can display posts according to custom post type, taxonomies.
- 1Click on Manage Rules menu of WP Post Pro Plugin, a list of all created rules will appear in new window.
- 2Now click on Edit link to make changes in that rule.
- 3A new page will display scroll down on Custom Post Types Taxonomies And Terms Filters.
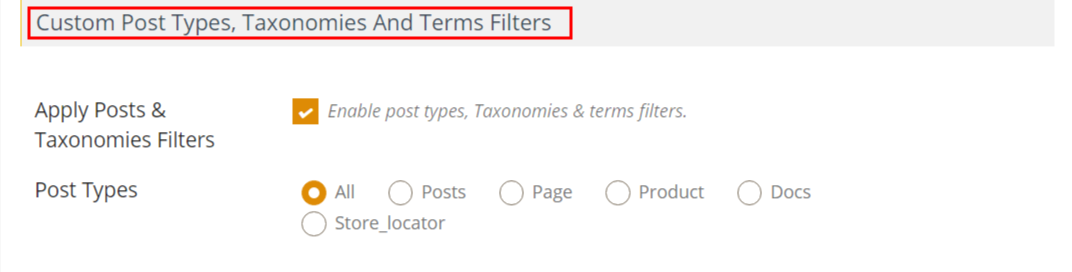
- Apply Posts & Taxonomies Filters : Tick to post types, taxonomies & terms filters.
- Post Types : Select Post Types
DATE(s) FILTERS
Sometimes a user wants to display posts according to date. So he can get a post with a different date.
- 1Click on Manage Rules menu of WP Post Pro Plugin, a list of all created rules will appear in new window.
- 2Now click on Edit link to make changes in that rule.
- 3A new page will display scroll down on Date(s) Filter
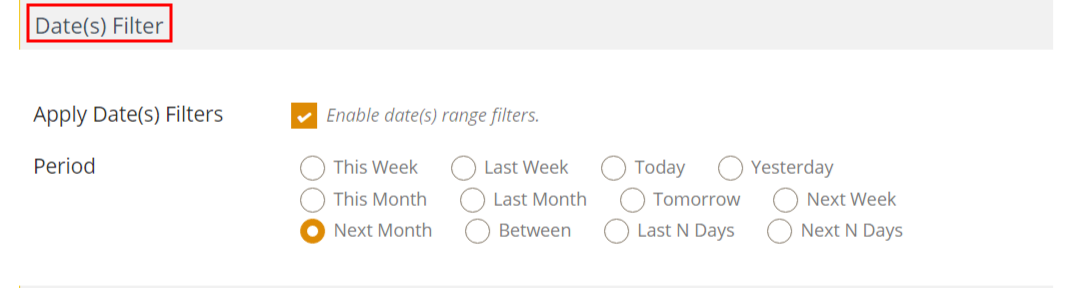
- Apply Date(s) Filters : Tick to enable date(s) range filters.
CUSTOM FIELDS FILTER
You can get posts according to custom fields of your post.
- 1click on Manage Rules menu of WP Post Pro Plugin, a list of all created rules will appear in new window.
- 2Now click on Edit link to make changes in that rule.
- 3A new page will display scroll down on Custom Fields Filter.
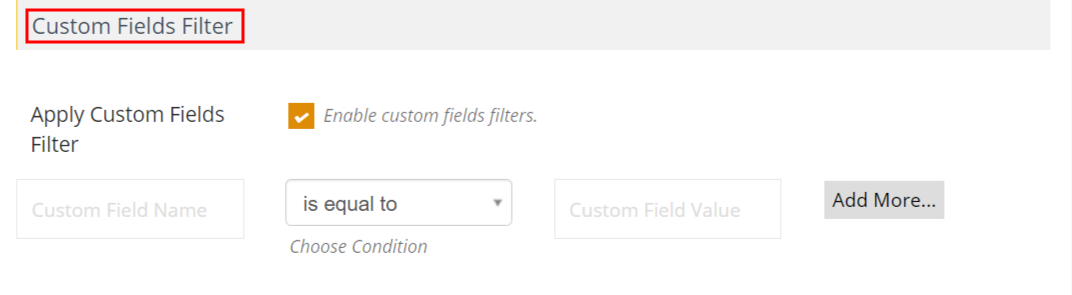
- Apply Custom Fields Filter : Tick to enable custom fields filters
- Click on save setting
NEW TEMPLATES
- Go to WP post pro ,Click on NEW TEMPLATES setting
TEMPLATE SETTINGS
You can get Template setting according to custom fields of your post.
- 1Click on Manage Template menu of WP Post Pro Plugin, a list of templates will display in new window.
- 2Now click on Edit link to make changes in post listing..
- 3A new page will display scroll down on Template Settings
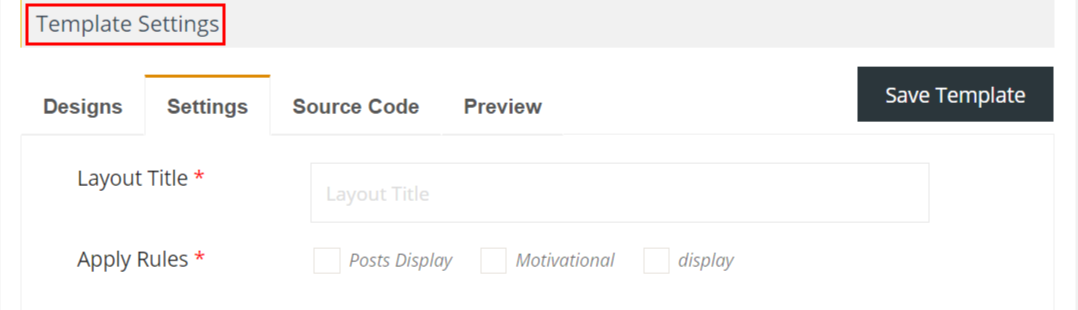
- Layout Title * : Insert your layout title .
- Apply Rules * : Tick to apply rule .
TITLE SETTINGS
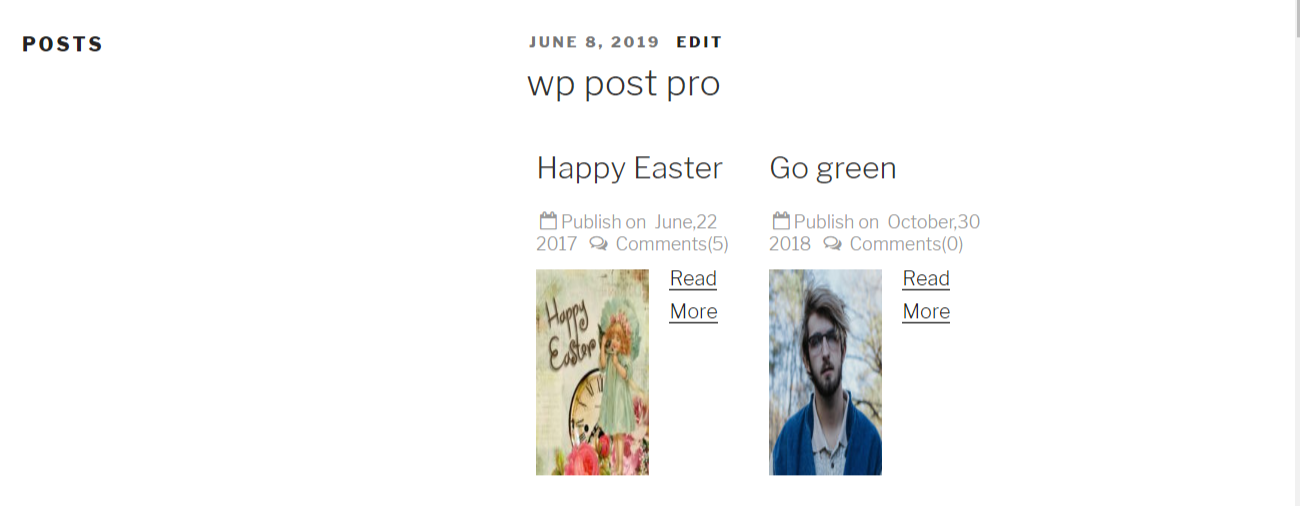
Sometimes the user does not want to display post title in listing. So it is very easy for a user to hide post title.
- 1Click on Manage Template menu of WP Post Pro Plugin, a list of templates will display in new window.
- 2Now click on Edit link to make changes in post listing.
- 3A new page will display scroll down on Title Settings
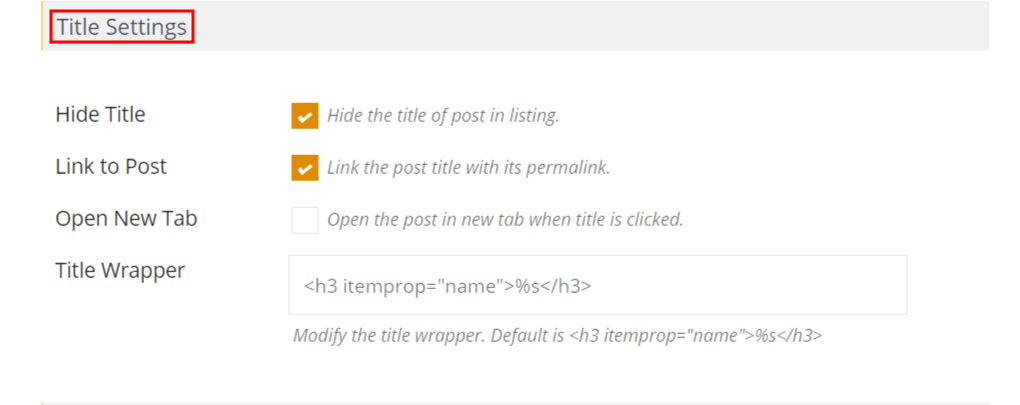
- Hide Title : Tick to hide the title of post in listing.
- Link to Post : Tick to link the post title with its permalink.

- Open New Tab : Tick to open the post in new tab when title is clicked.
- Title Wrapper : Insert modify the title wrapper
CONTENT SETTINGS
Sometimes the user does not want or modify read more content of the post in the listing. It is very easy for a user to hide or modify read more content in post listing.
- 1Click on Manage Template menu of WP Post Pro Plugin, a list of templates will display in new window.
- 2Now click on Edit link to make changes in post listing..
- 3A new page will display scroll down on Content Settings
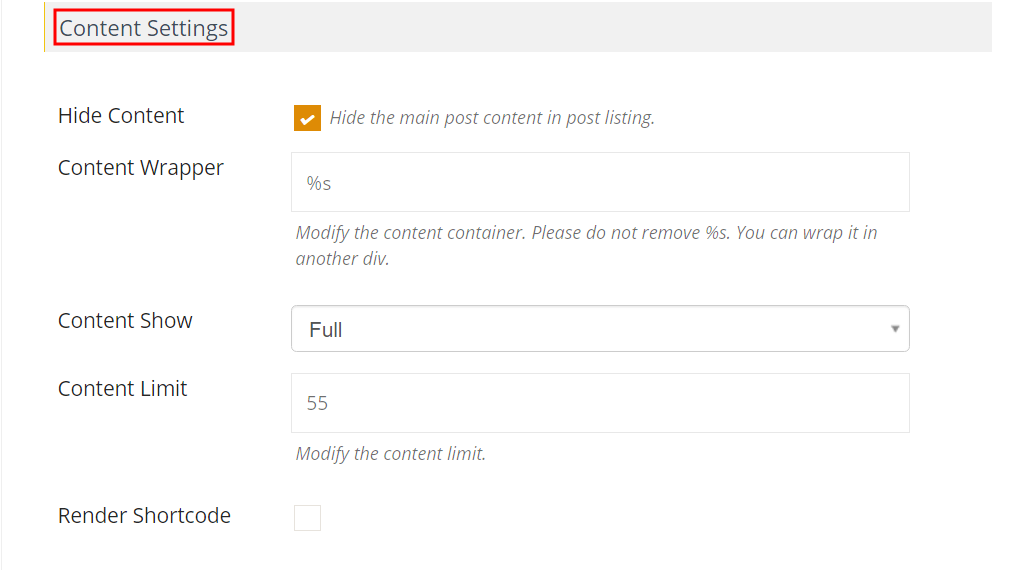
- Content Wrapper : Insert modify the content container.
- Content Show : Insert content show
Excerpt
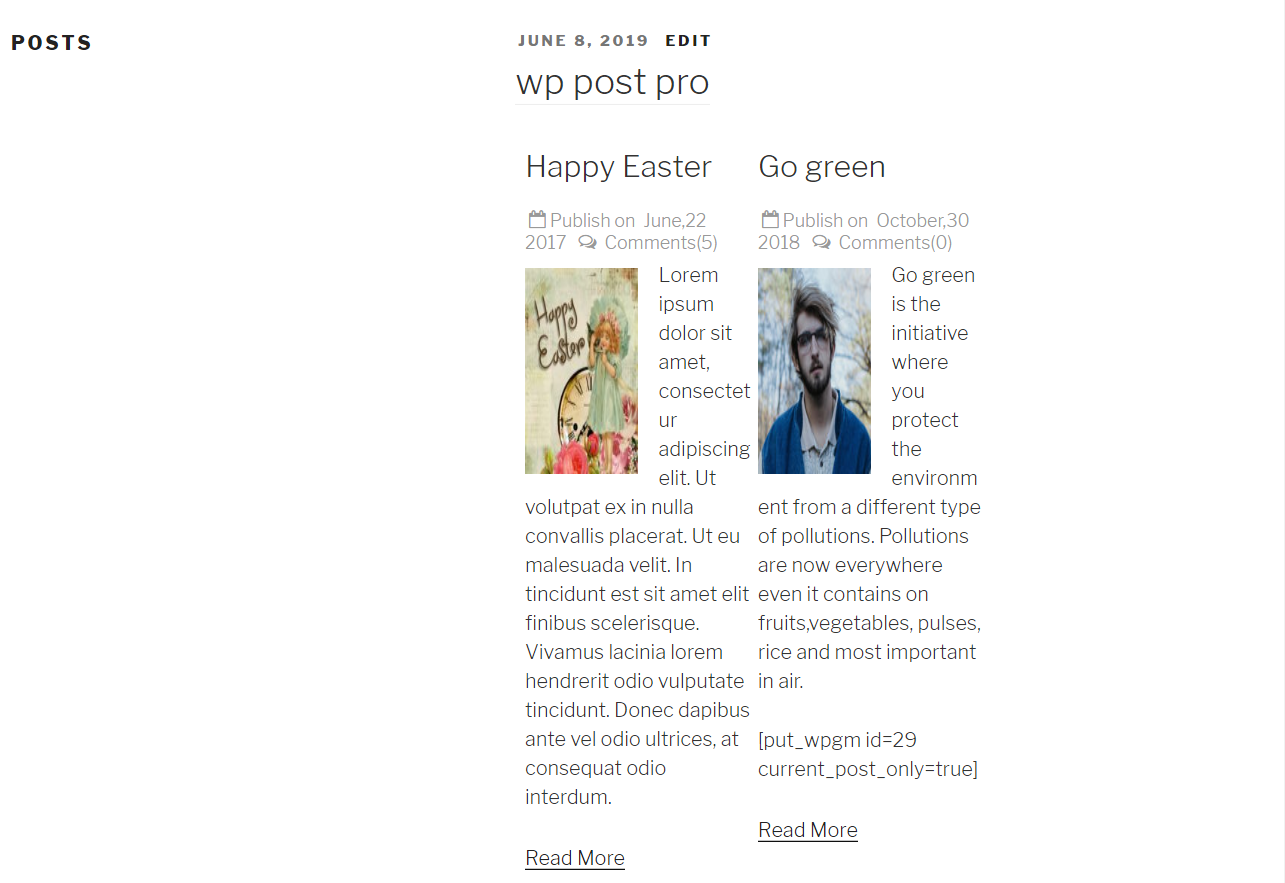
Full
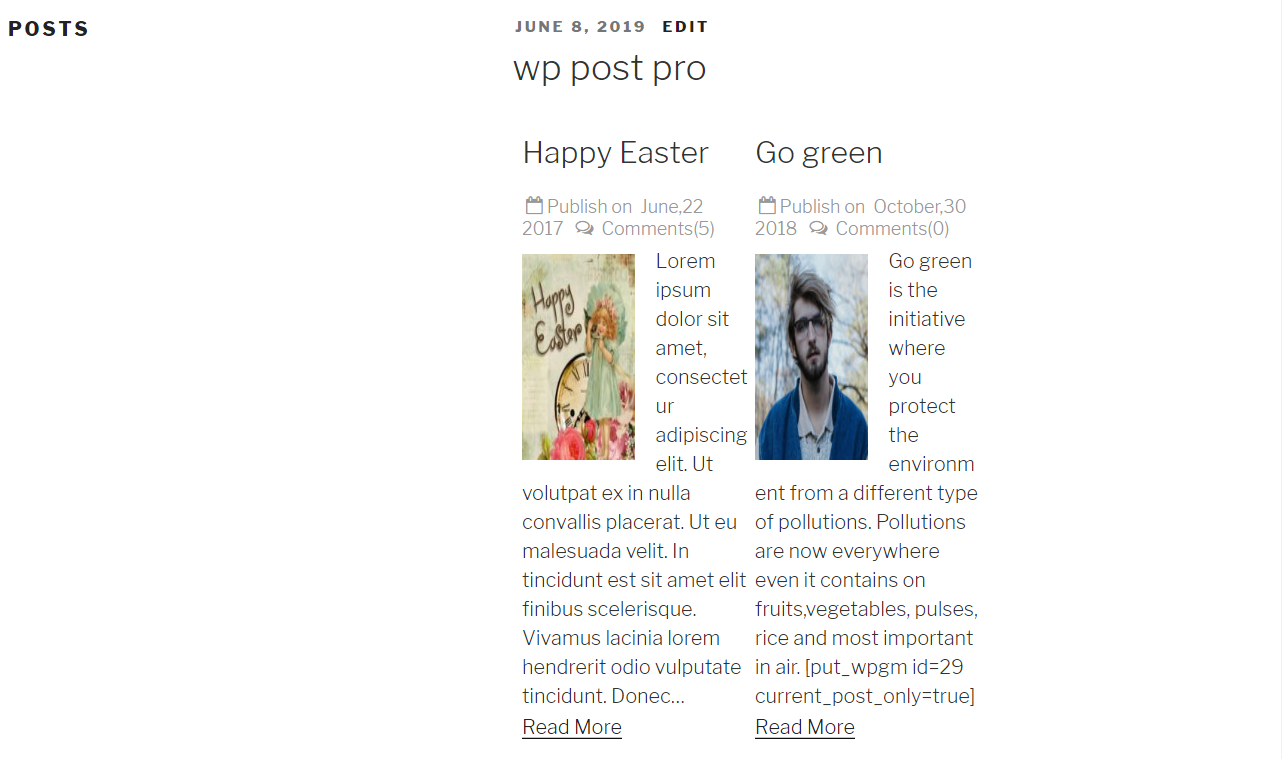
- Content Limit : Type here content limit.
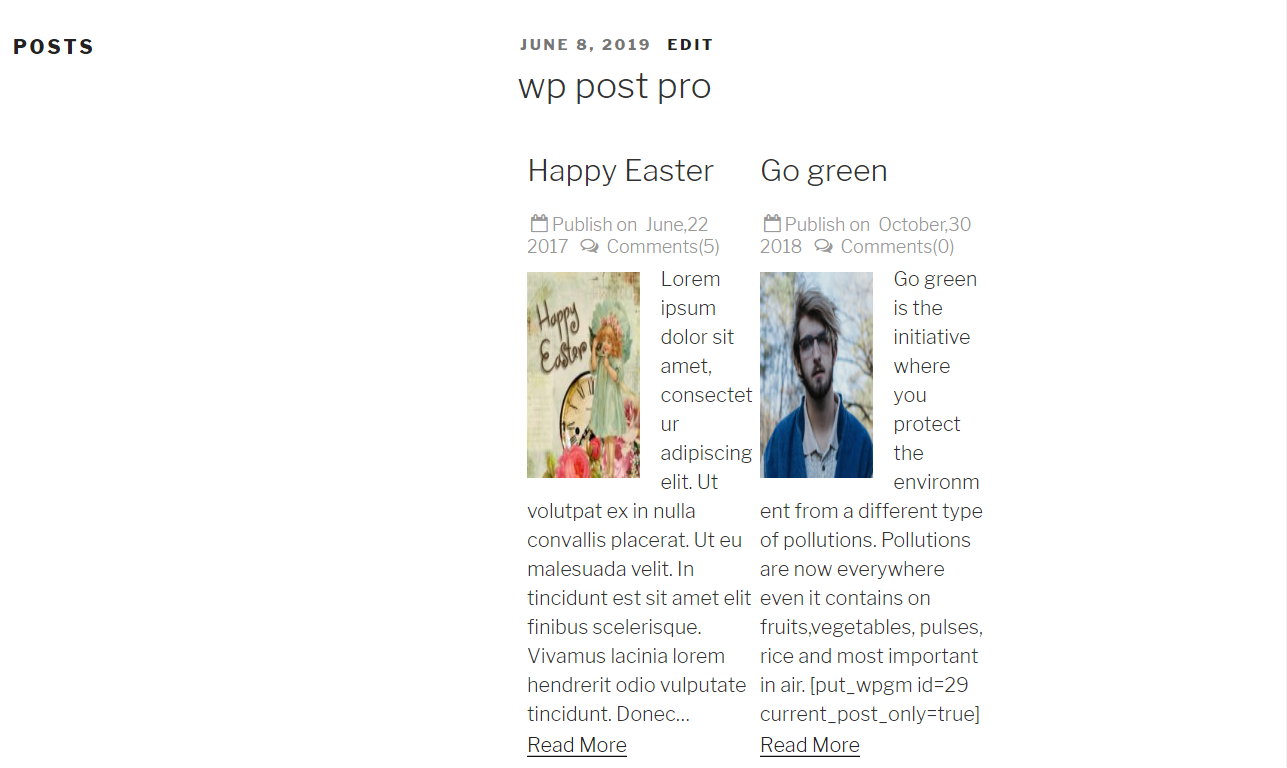
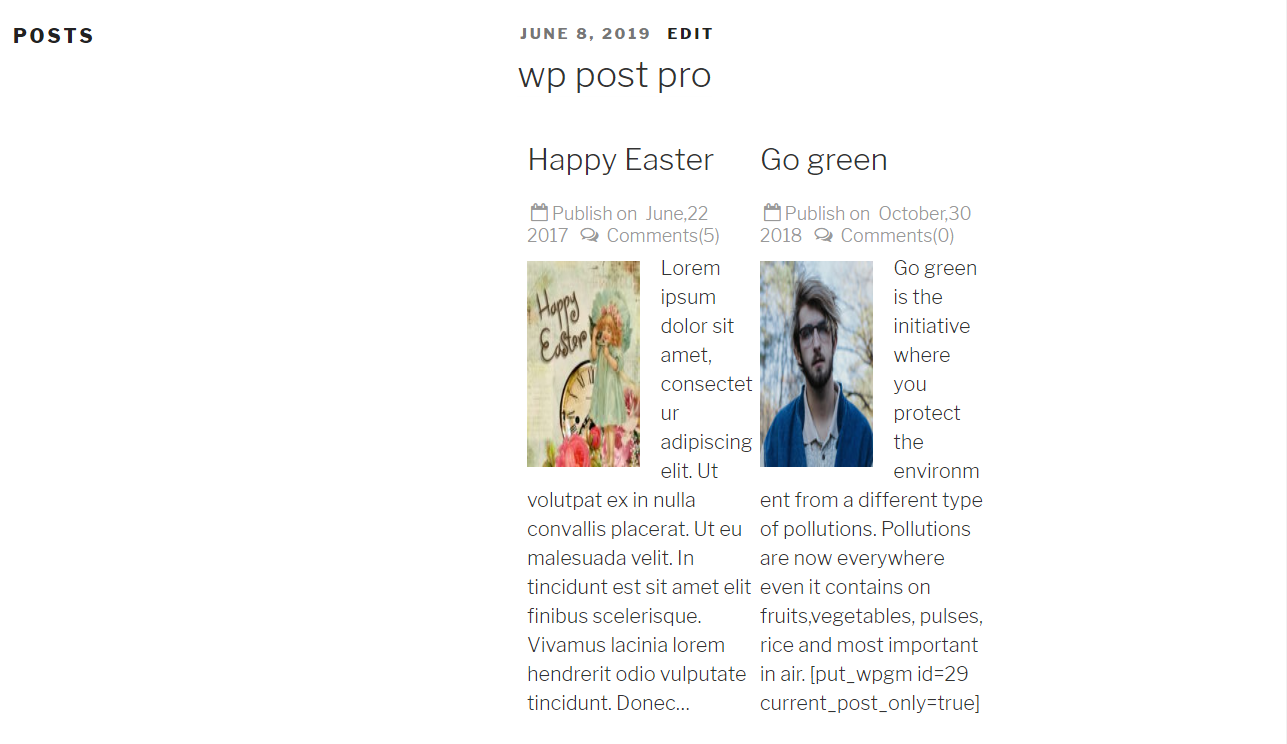
FEATURED IMAGE SETTINGS
Sometimes user wants to apply some filters in post listing, as he wants to display only those posts which have featured/thumbnail image. You can skip user posts which do not have featured/thumbnail image from post listing page.
- 1Click on Manage Template menu of WP Post Pro Plugin, a list of templates will display in new window.
- 2Now click on Edit link to make changes in post listing..
- 3A new page will display scroll down on Featured image Settings
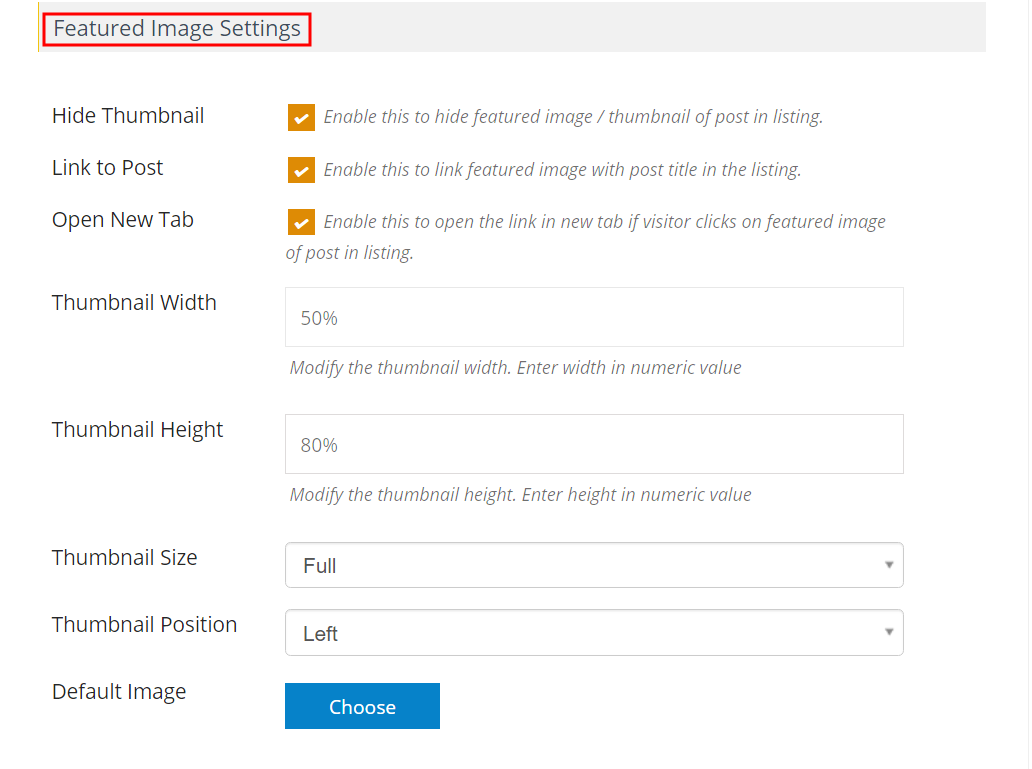
- Link to Post: Enable this to link featured image with post title in the listing.
- Open New Tab: Enable this to open the link in a new tab if a visitor clicks on the featured image of the post in the listing. Thumbnail Width: Insert thumbnail width.
Thumbnail Height: Insert thumbnail height.
Thumbnail Size: Choose your Thumbnail Size
Thumbnail Position: Choose your Thumbnail Position
Default Image: You can choose file media from your computer
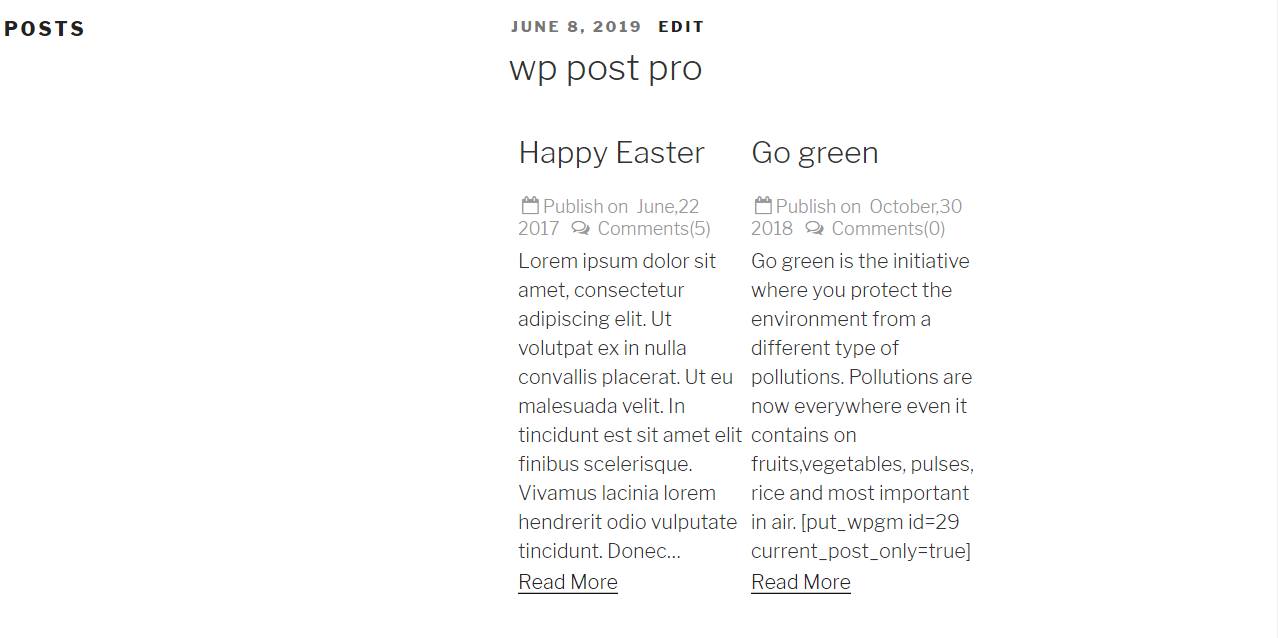
READ MORE SETTINGS
Sometimes a user wants to hide or modify read more content of the post in the listing. It is very easy for a user to hide or modify read more content in the listing.
- 1Click on Manage Template menu of WP Post Pro Plugin, a list of templates will display in a new window.
- 2Now click on Edit link to make changes in post listing..
- 3A new page will display scroll down on Read more Settings
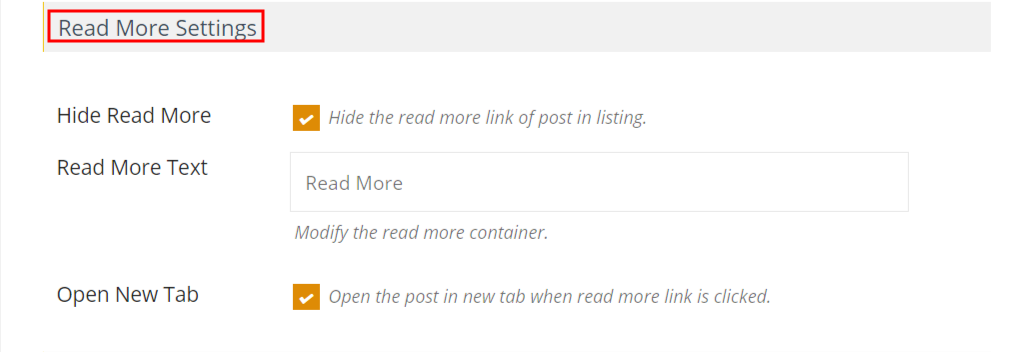
- Read More Text : Insert read More container.
- Open New Tab : Insert open the post in new tab when read more link is clicked.
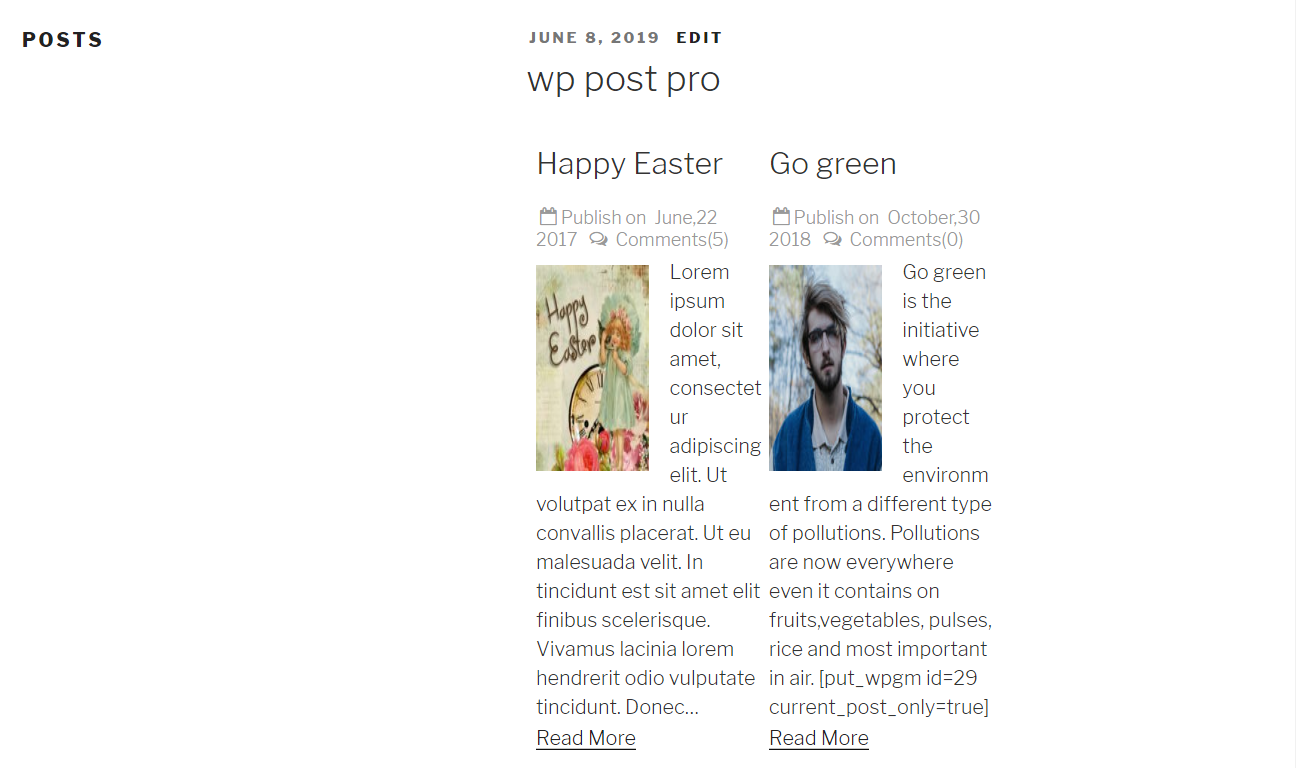
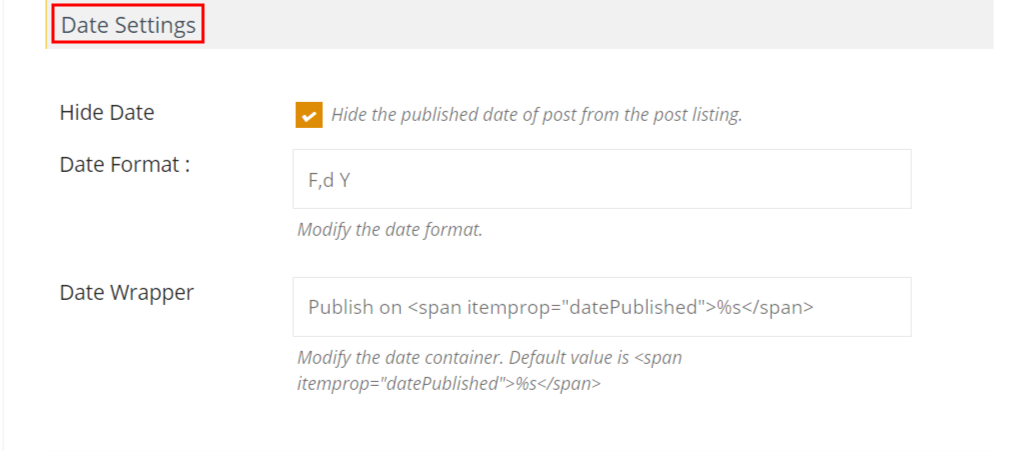
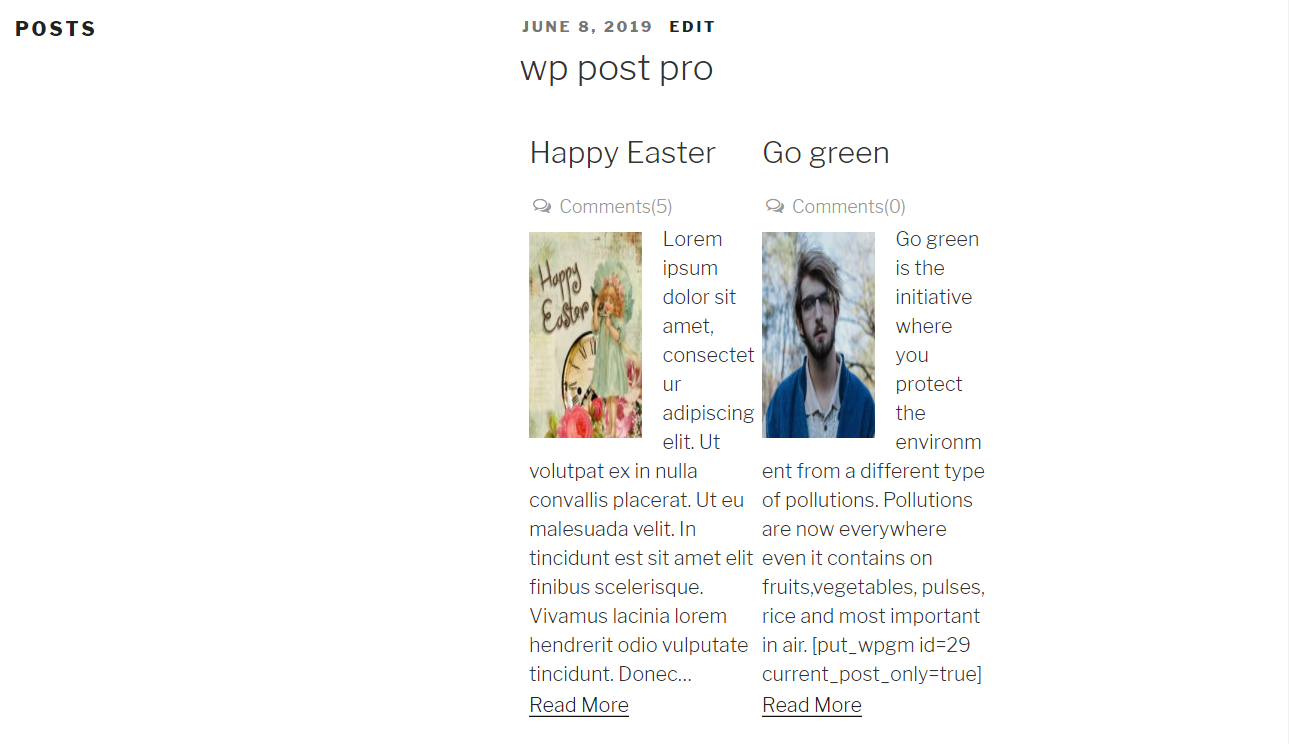
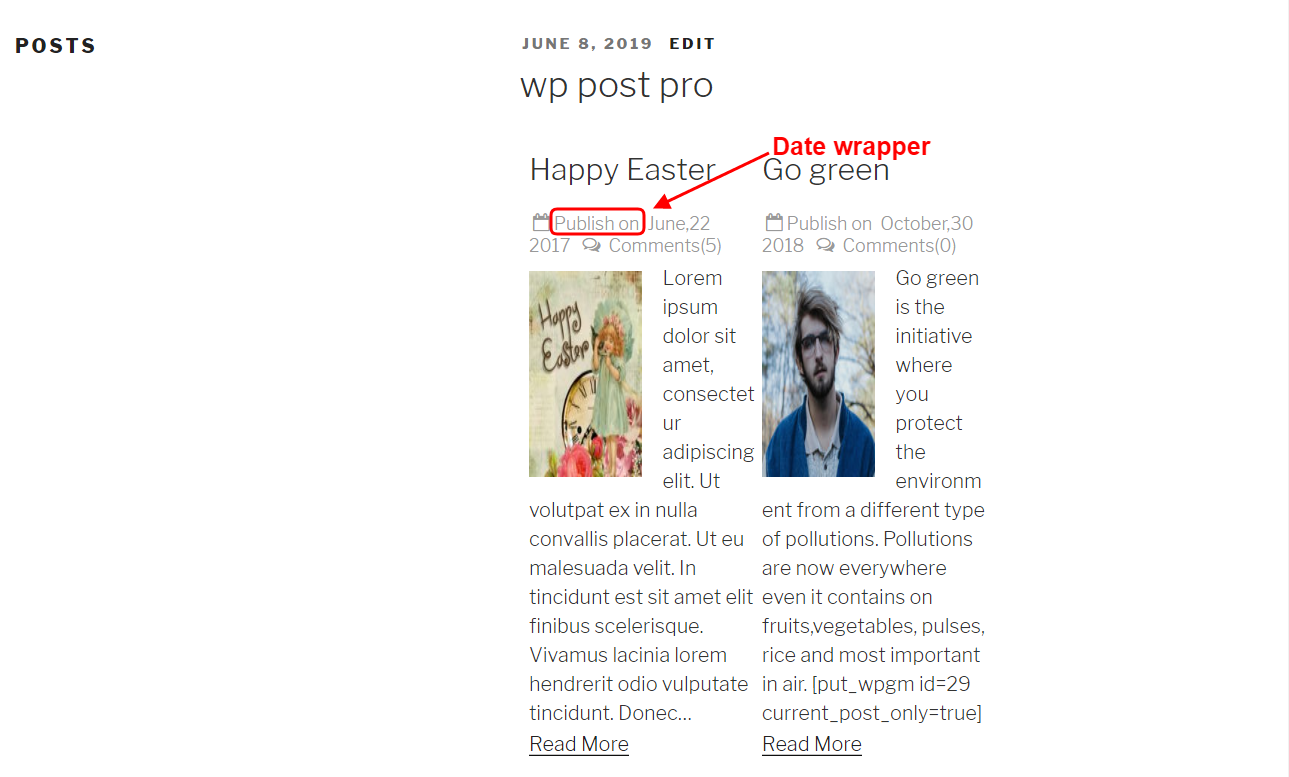
DATE SETTINGS
Sometimes a user wants to display posts according to date. So he can get post with different date.
- 1Click on Manage Template menu of WP Post Pro Plugin, a list of templates will display in new window.
- 2Now click on Edit link to make changes in post listing..
- 3A new page will display scroll down on Date Settings
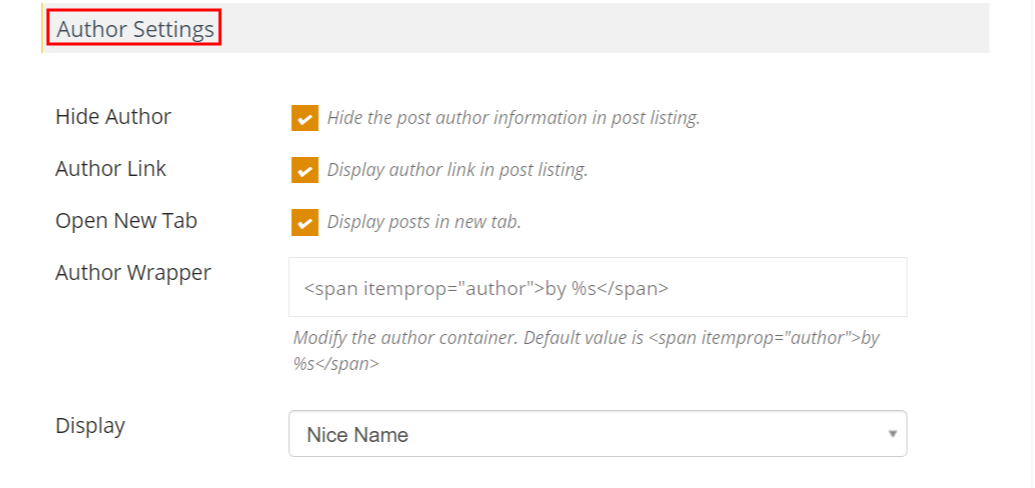
AUTHOR SETTINGS
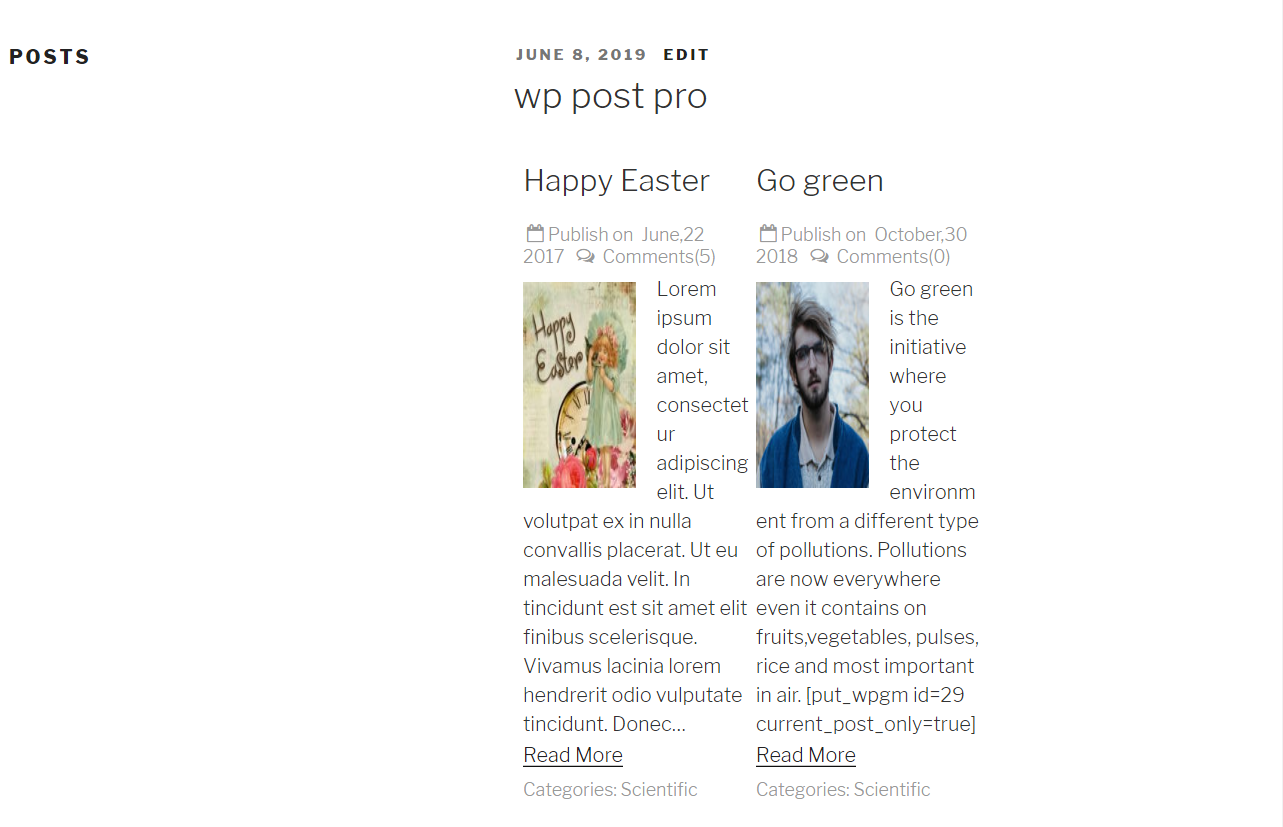
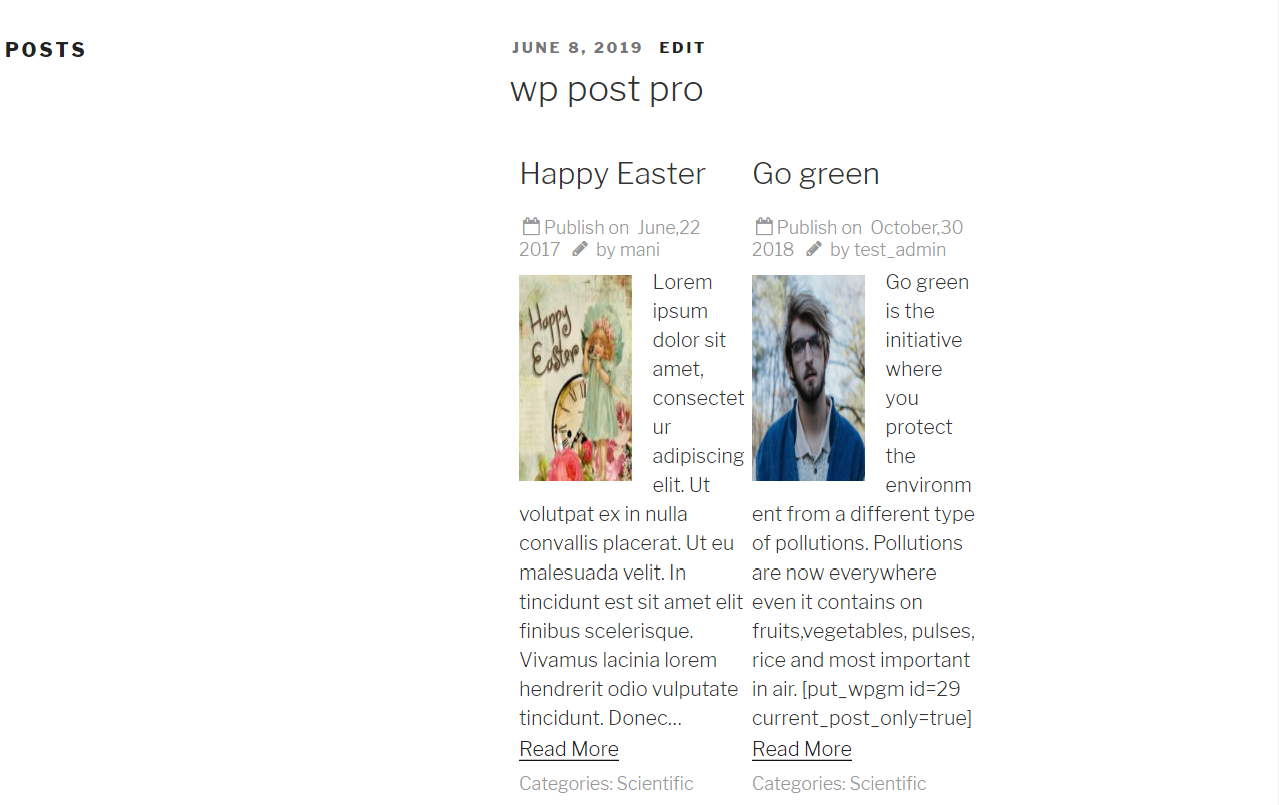
Sometimes user wants to hide author from post listing page. You can easily hide the author name with the help of the author setting.
- 1Click on Manage Template menu of WP Post Pro Plugin, a list of templates will display in new window.
- 2Now click on Edit link to make changes in post listing..
- 3A new page will display scroll down on Author Settings
COMMENTS SETTINGS
Sometimes user wants to hide comments from post listing page. You can easily hide comment with the help of comments setting.
- 1Click on Manage Template menu of WP Post Pro Plugin, a list of templates will display in new window.
- 2Now click on Edit link to make changes in post listing..
- 3A new page will display scroll down on comments Settings
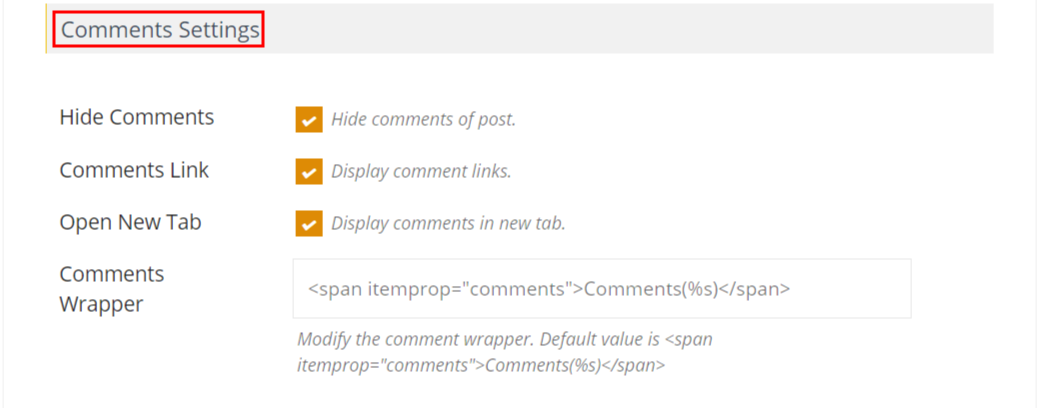
- Comments Link : Tick to display comment links.
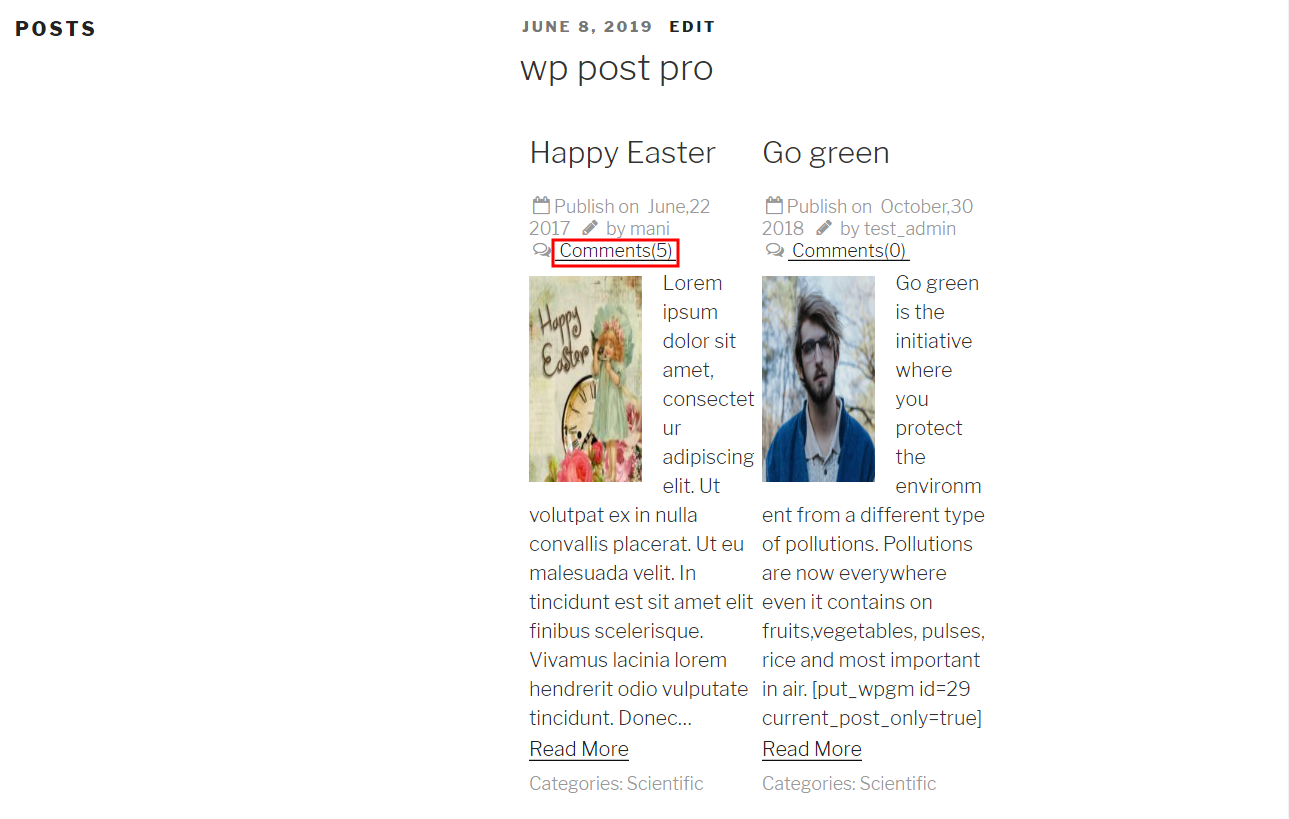
- Open New Tab : Tick to Display comments in new tab.
- Comments Wrapper : Insert comment wrapper
CATEGORIES SETTINGS
Sometimes user wants to hide categories from post listing page. You can easily hide categories name with the help of categories setting.
- 1Click on Manage Template menu of WP Post Pro Plugin, a list of templates will display in new window.
- 2Now click on Edit link to make changes in post listing..
- 3A new page will display scroll down on category Settings
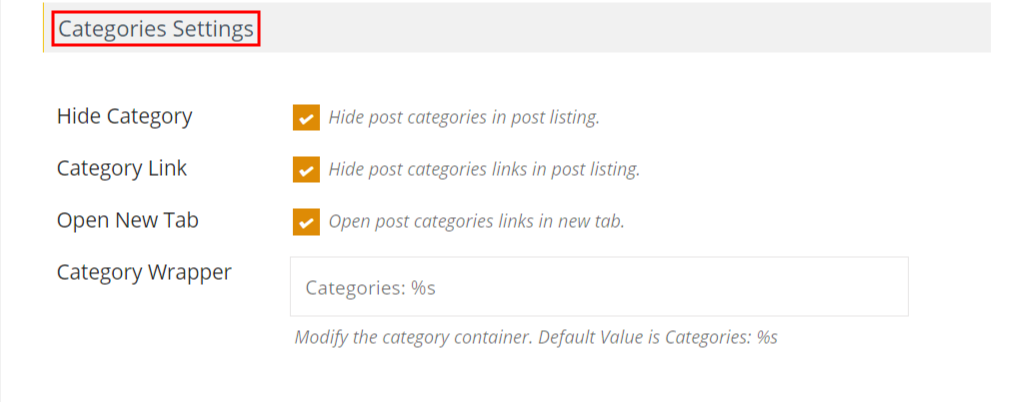
- Hide Category : Hide post categories in post listing.
- Category Link : Hide post categories links in post listing.
- Open New Tab : Open post categories links in new tab.
- Category Wrapper : Insert your category
TAGS SETTINGS
Sometimes user wants to hide tag from post listing page. You can easily hide tag with the help of tag0 setting.
- 1Click on Manage Template menu of WP Post Pro Plugin, a list of templates will display in new window.
- 2Now click on Edit link to make changes in post listing..
- 3A new page will display scroll down on Tag Settings
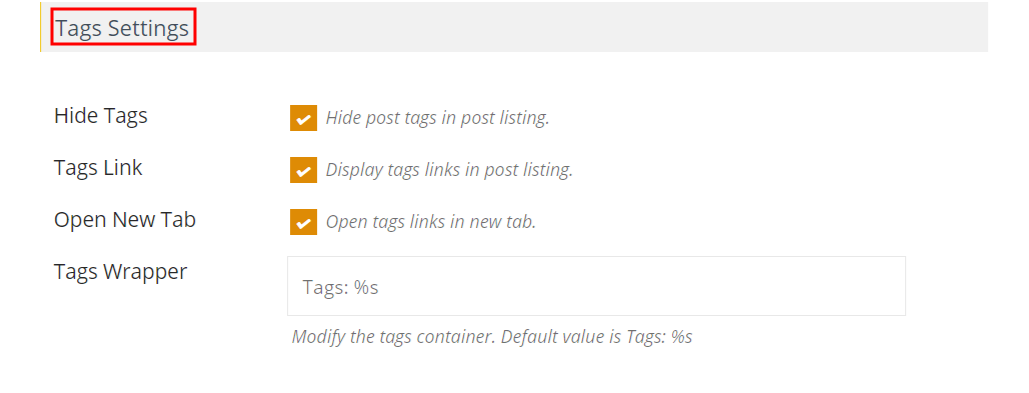
- Hide Tags : Tick to hide post tags in post listing.
- Tags Link : Tick to display tags links in post listing.
- Open New Tab : Tick to open tags links in new tab.
- Tags Wrapper : Insert the tags container.
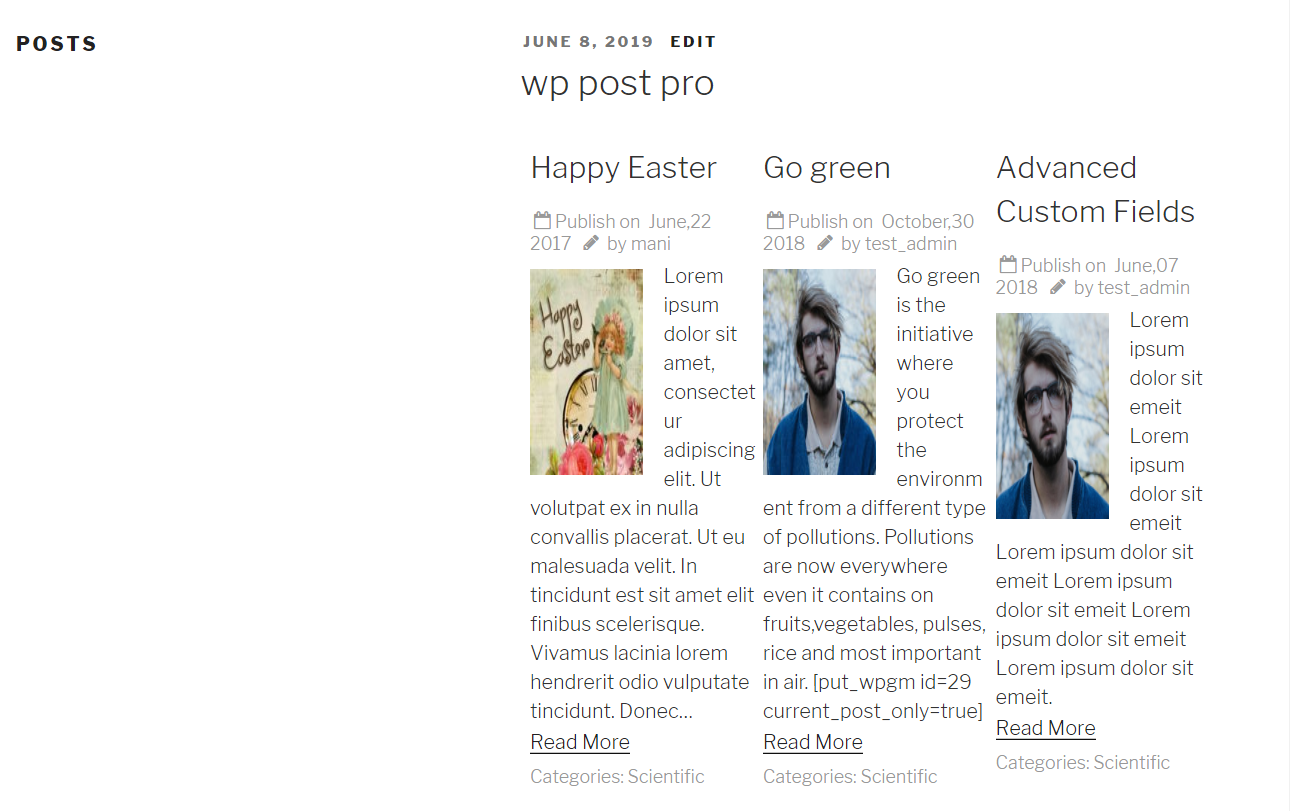
GRID SETTINGS
A user can display post in different grids according to the number of posts. By selecting a grid view a user can make posts listing very attractive.
- 1Click on Manage Template menu of WP Post Pro Plugin, a list of templates will display in new window.
- 2Now click on Edit link to make changes in post listing..
- 3A new page will display scroll down on Grid Settings

- Grid Columns : Select the Grid Columns for post listing
PAGINATION SETTINGS
User can decide how many posts he wants to display on per page. It is very easy for him to select a post per page.
- 1Click on Manage Template menu of WP Post Pro Plugin, a list of templates will display in new window.
- 2Now click on Edit link to make changes in post listing..
- 3A new page will display scroll down onPagination Settings
User can decide how many posts he wants to display on per page. It is very easy for him to select post per page.
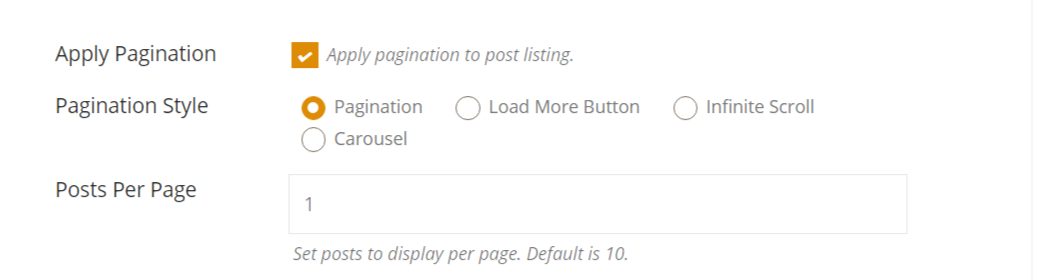
- Apply Pagination : Tick to apply pagination to post listing.
- Pagination Style : Tick to Pagination Style
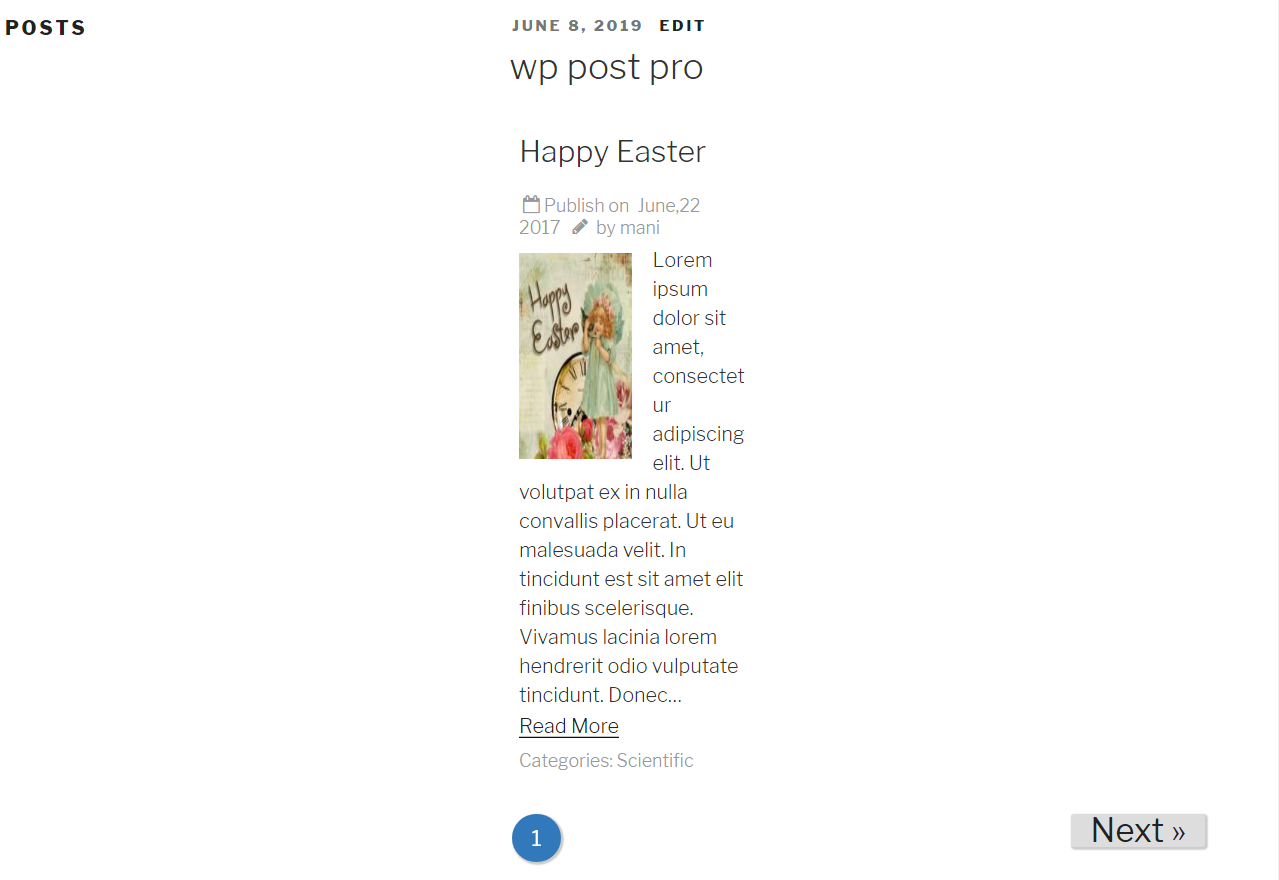
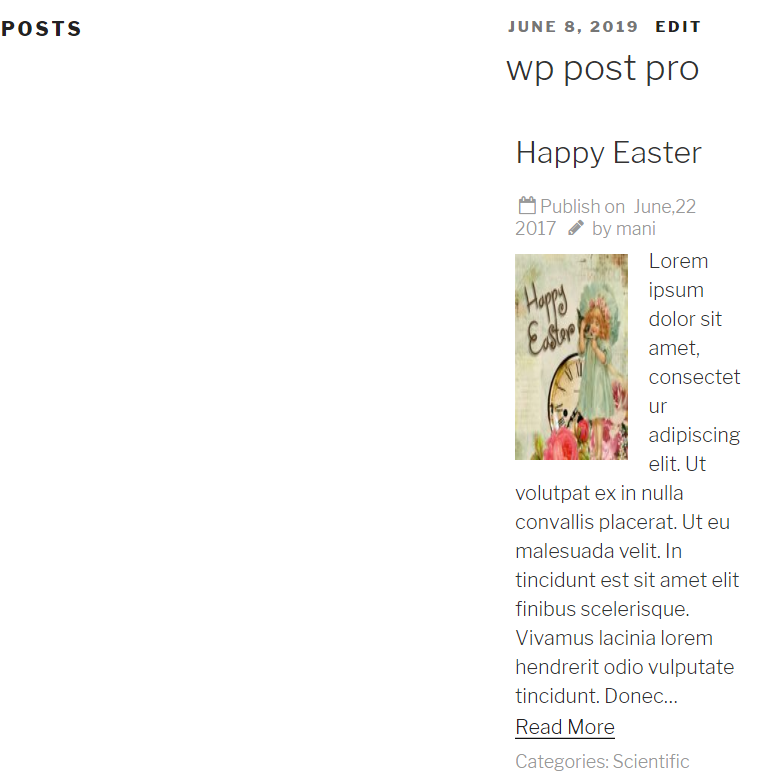
- Posts Per Page : Tick on Pagination and give the number of posts to display on per page in Posts Per Page.
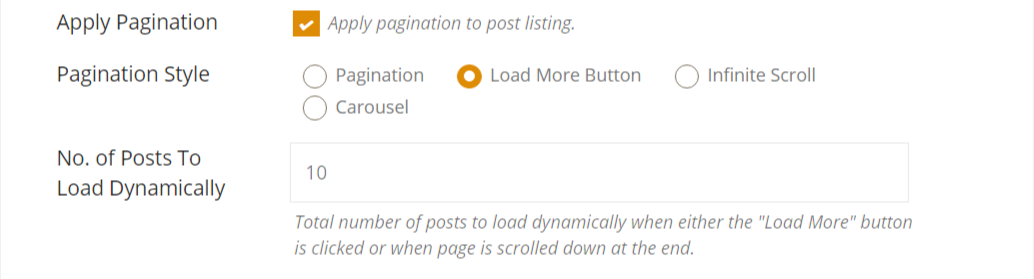
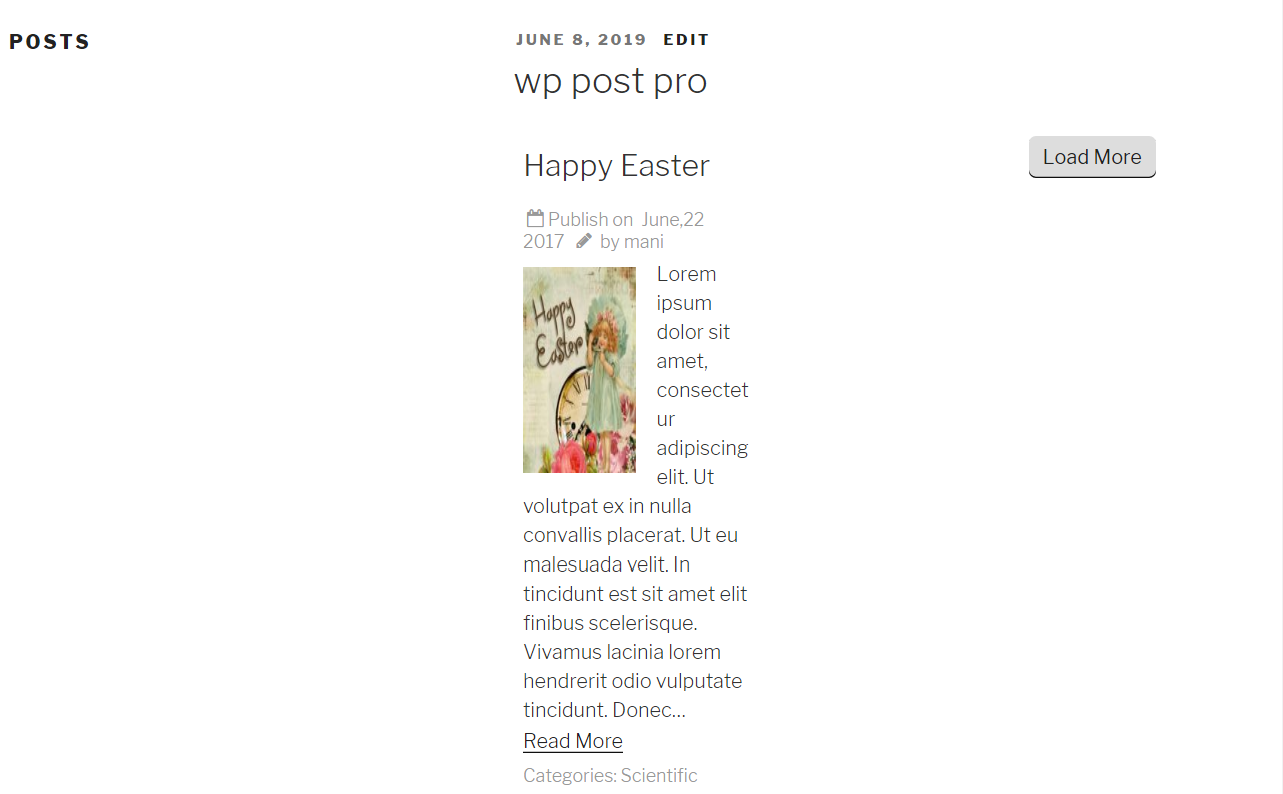
- Pagination Style : Choose Load More Button
- No. of Posts To Load Dynamically : Insert total number of posts to load dynamically
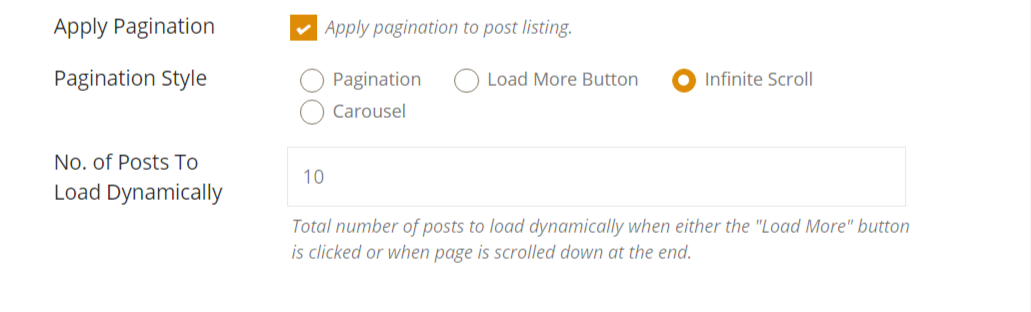
- Pagination Style : Choose Infinite Scroll
- No. of Posts To Load Dynamically : Insert total number of posts to load dynamically
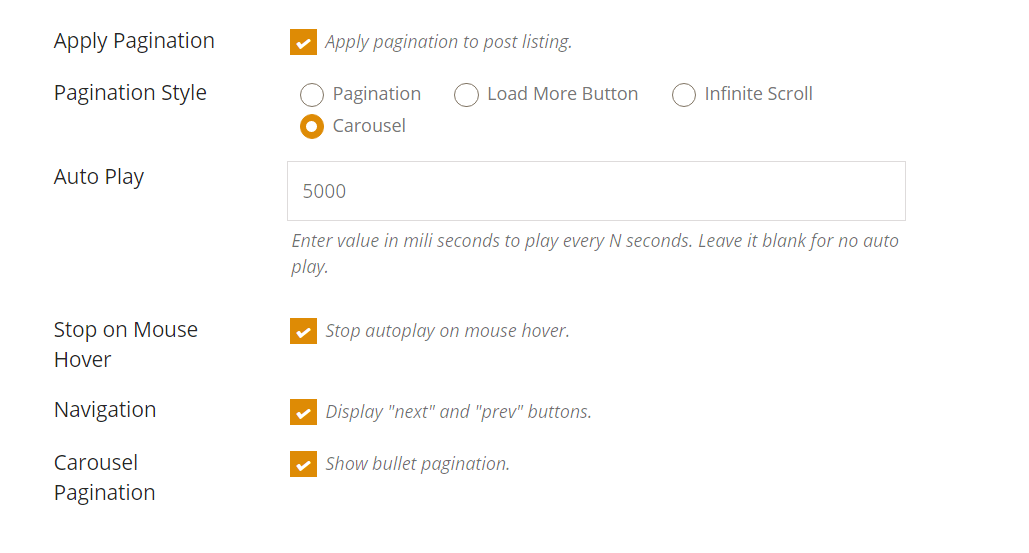
- Pagination Style : Choose Carousel style
- Auto Play : Time Taken for next post, you can leave this if you want to stop auto play of post.
- Stop on Mouse Hover : It will stop auto play of post when you put mouse cursor on post area
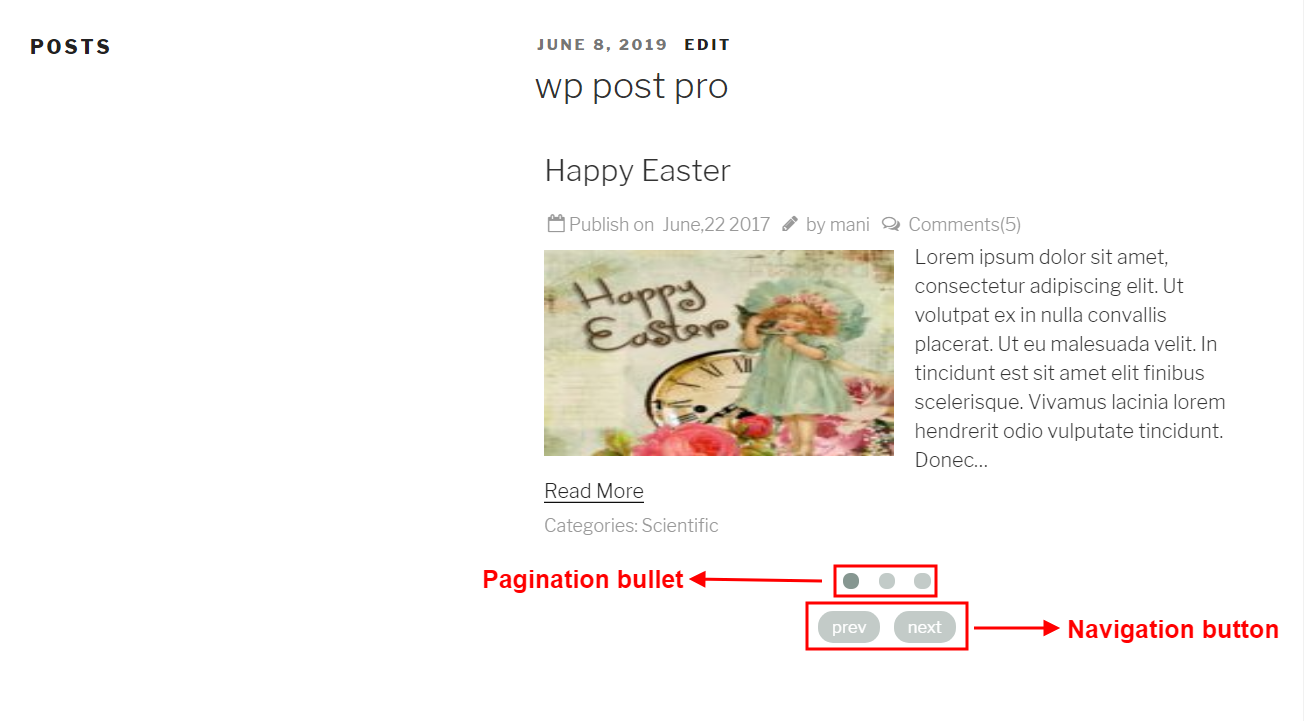
- Navigation : It will display Next and Previous button on listing.
- Carousel Pagination : You can display bullet on post.
- Click on save setting
SHORTCODE
- 1First give the Layout Title

- 2Select the rule
- 3Click on save setting
- 4Now go and click on Manage Templates menu.
- 5 A new window will appear copy the short code.

- 6Copy and paste the short code in post listing page.
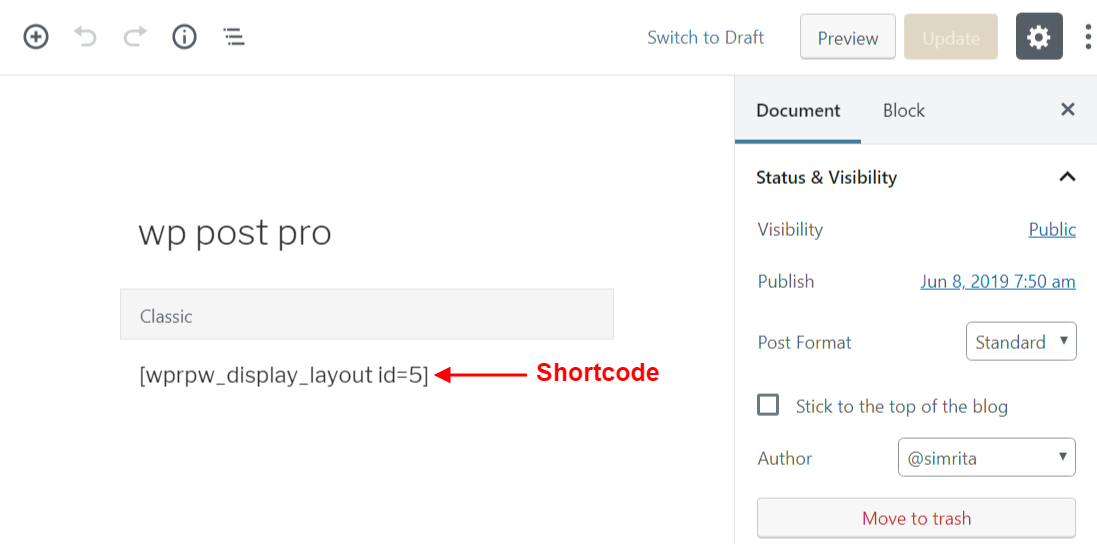
- 7You would then see a WP POST PRO displayed on the frontend of the site
HOW TO SELECT DESIGN OF POSTS?
To display posts in listing it is important that listing of posts must be attractive. To make a listing attractive user can select the design for posts.
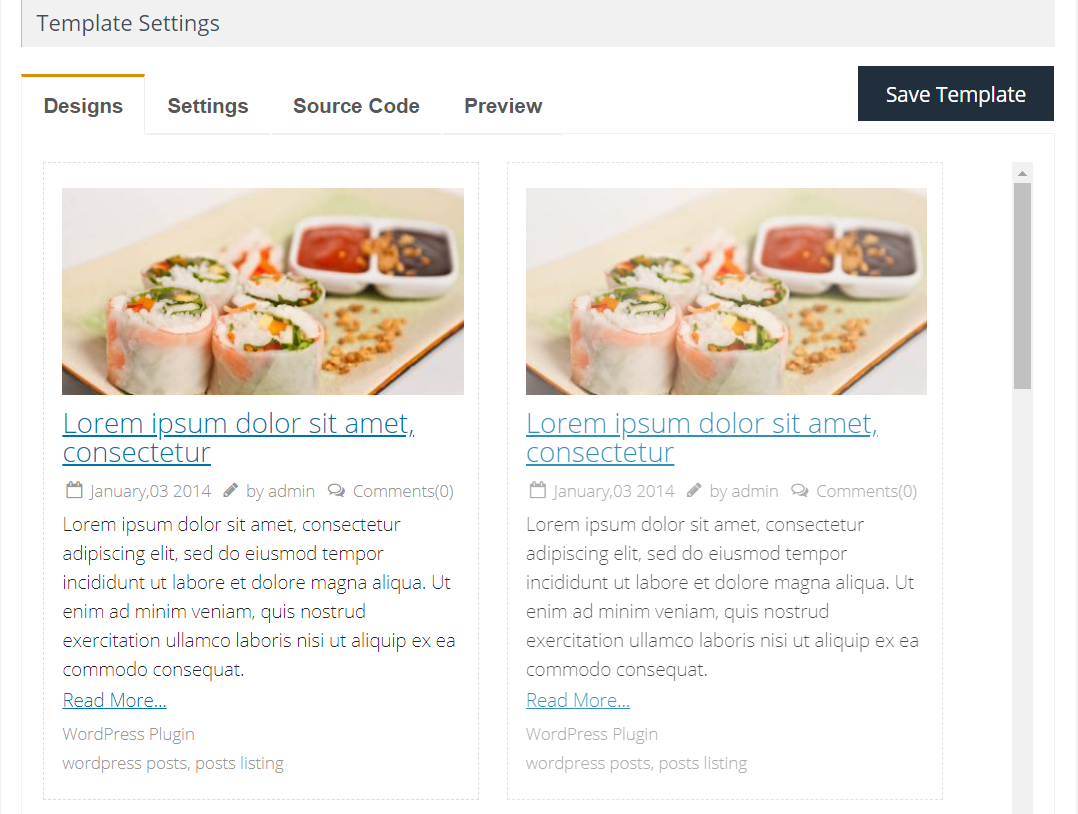
- 1First of all click on Manage Templates menu of WP Post Pro Plugin, a new window will appear with listing of templates.
- 2Choose the template you want to make changes in design and click on Edit link of template, a new window will display.
- 3Click on Design menu in Template Settings section.
- 4Now choose one of them out of 10 designs which is your favorite,a popup message will appear, click on ok to change the design.
- 5Now click on Save Template button.

HOW TO CREATE YOUR OWN DESIGN?
A design of post in listing page is important. It must be attractive. To make a listing page more attractive here some design is given you can select your favorite design or you can create your own design.

- 1First click on Manage Templates menu of WP Post Pro Plugin in a list of created templates will appear in new window.
- 2Now choose the template in which you want to make changes and click on Edit link.
- 3Now click on Source Code menu at the top of the page.On the right side some placeholders is given,copy the Placeholders and paste in text-area.
- 4Click on Save Template button.
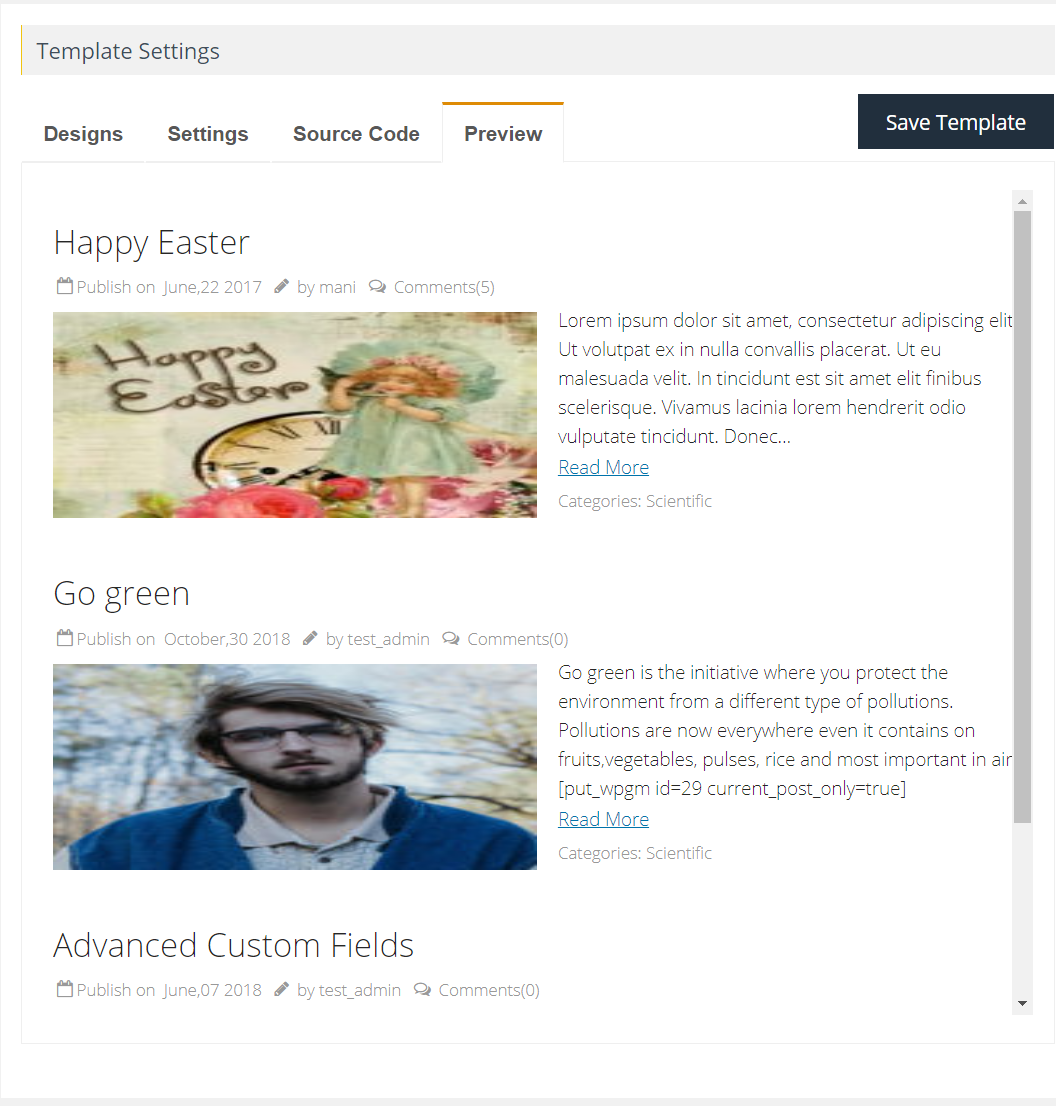
HOW TO PREVIEW YOUR DESIGN?
A user can preview the selected design and created design. Sometimes a user wants to check how design looks in listing without updating the changes. He can preview his design which he created or selected.

- 1First click on Manage Templates menu of WP Post Pro Plugin a list of created templates will appear in new window.
- 2Now choose the template in which you want to make changes.
- 3Now first create/select design for post listing.
- 4Now click on Preview menu at the top of the page to preview of design.