Documentation
INTRODUCTION
WordPress Contact form 7 is one of the most popular plugin for creating and generating forms.It is easy to integrate and equally easy to display.When it comes to wordpress, there are many contact form wordpress plugin and one of the most simple and smart ones is contact form 7 plugin.Google Maps Extension for CF7 brings Google Maps to Contact Form 7. The user can place markers or shapes on google maps. This makes it easier to get a location from the user. You must have installed Contact Form 7 plugin before using Contact Form 7 Google Maps.
PLUGIN INSTALLATION
How to install contact form 7 plugin in wordpress -Step by Step:
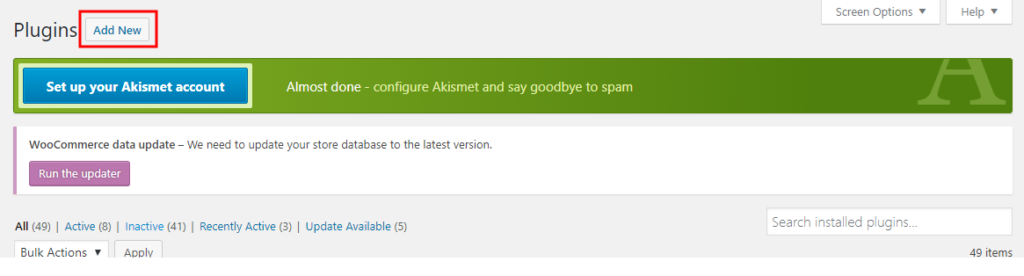
- 1Go to Plugins menu.
- 2Click on a Add New button.
- 3On top of the page, click “Upload Plugin” button.
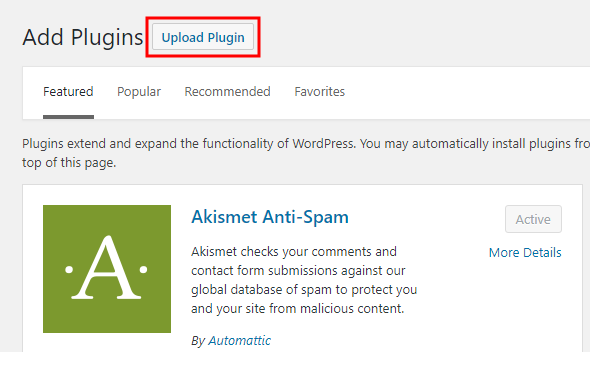
- 4If you have a plugin in a .zip format, click on “Choose File” button.
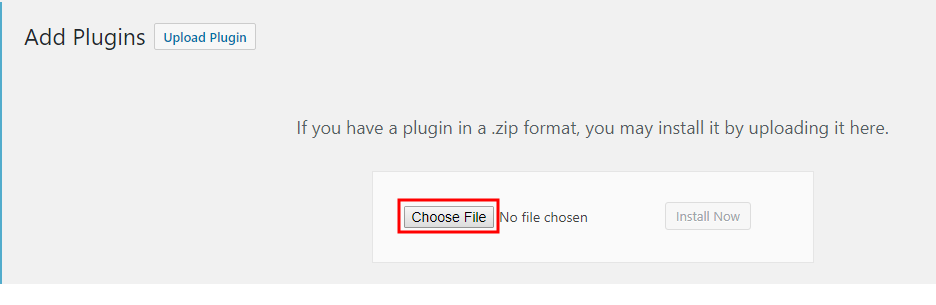
- 5Select the ZIP file from your computer.
- 6Click “Install Now” button.

- 7.Wait for a few seconds for wordpress to complete the installation .
- 8Click on Activate button.

CREATE API KEY
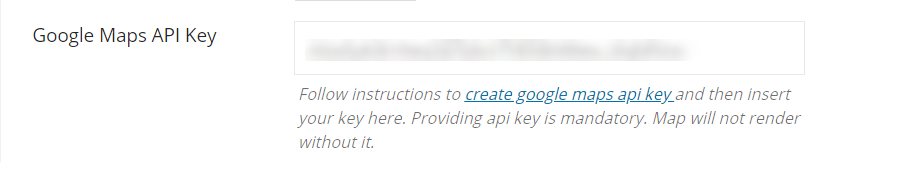
API key is the mandatory to insert for proper working of a google maps. So please follow the steps to get an API key.
- 1Go to CF7 Google Maps “how to use “menu, click on Google Map API Key.
- 2Click create a project button
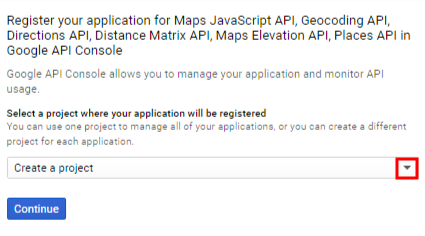
- 3 Enter your project name.

- 4 Click on create button.
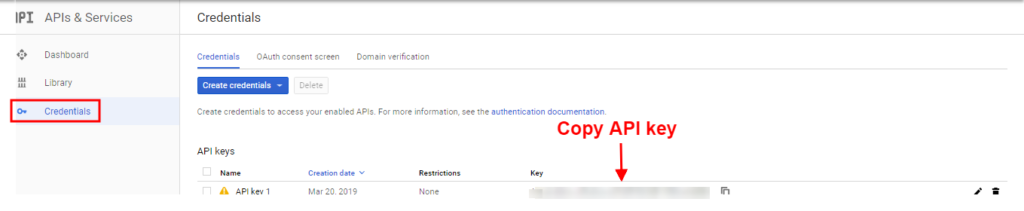
- 5Go to Credentials and copy your API key.
- 6Go CF7 Google Maps – plugin setting and paste in Google Maps API Key
CF7 GOOGLE MAPS PLUGIN SETTINGS
- 1Go to CF7 Google Map menu, click on Plugin Settings.
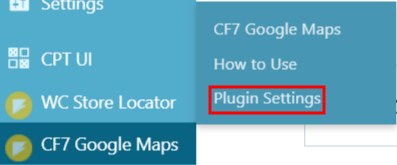
- 2 Go to plugin setting page and insert details.
In plugin setting you will find some setting, where you need to insert some information:
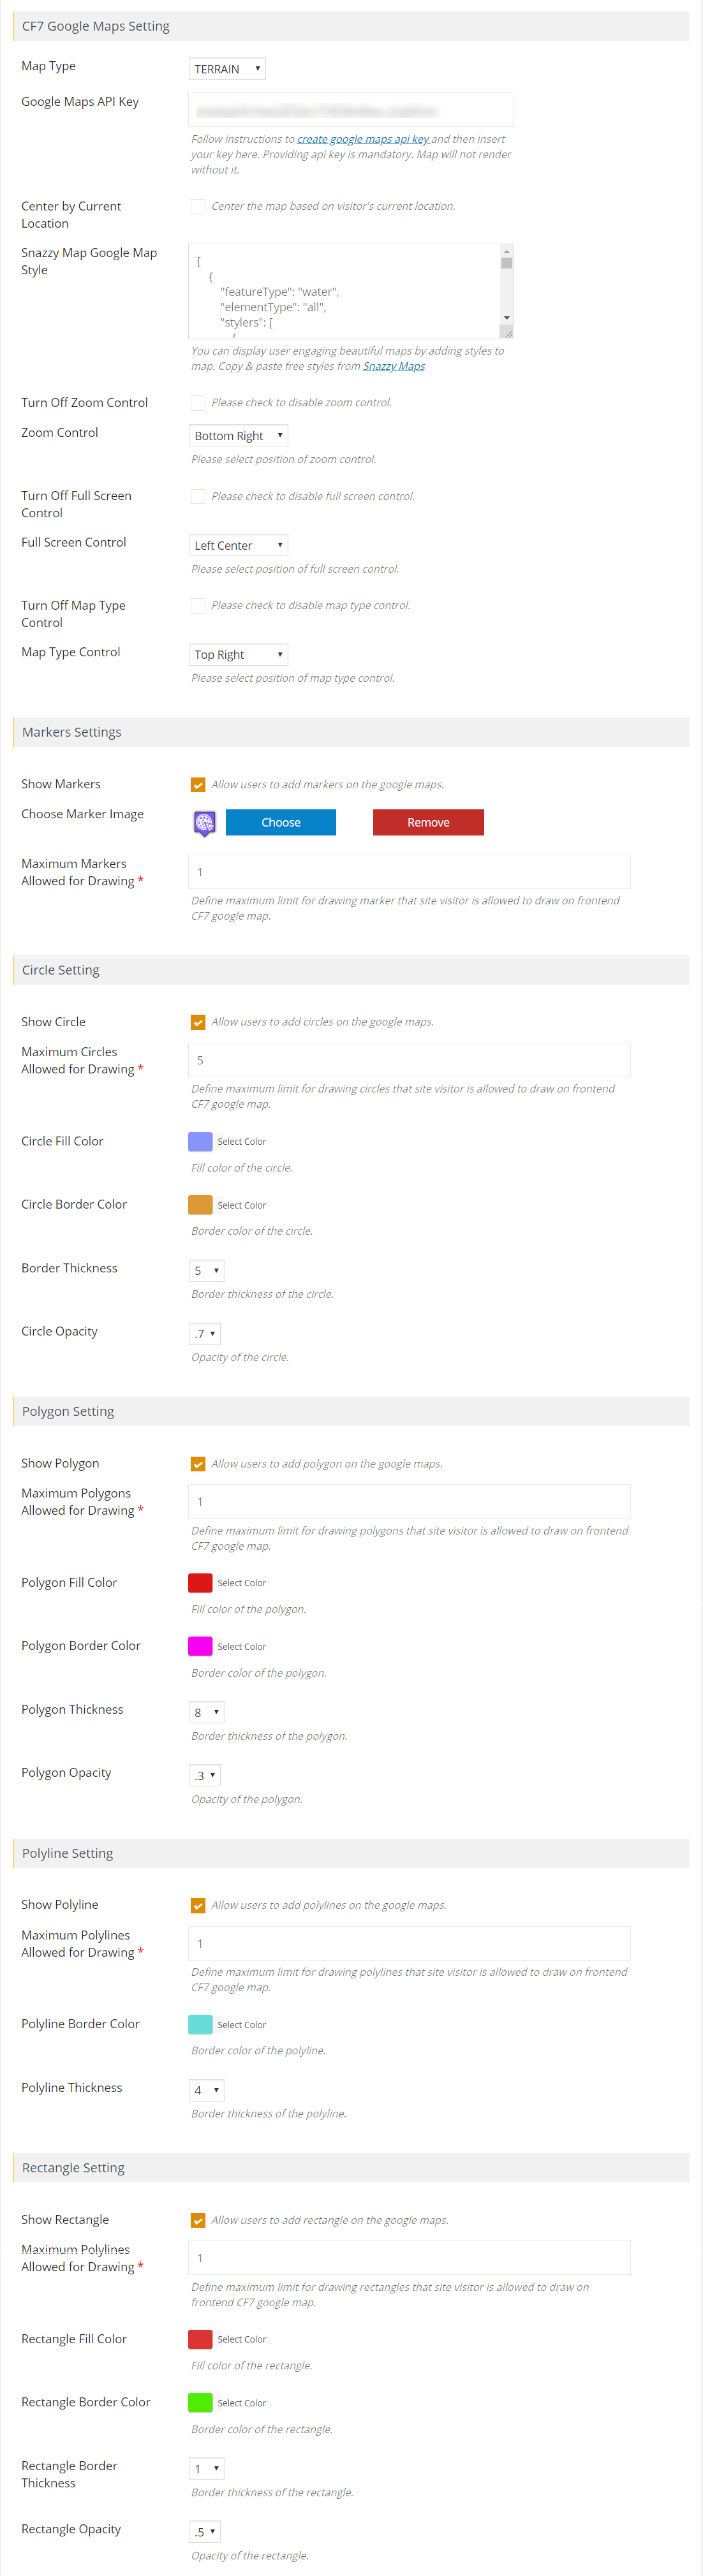
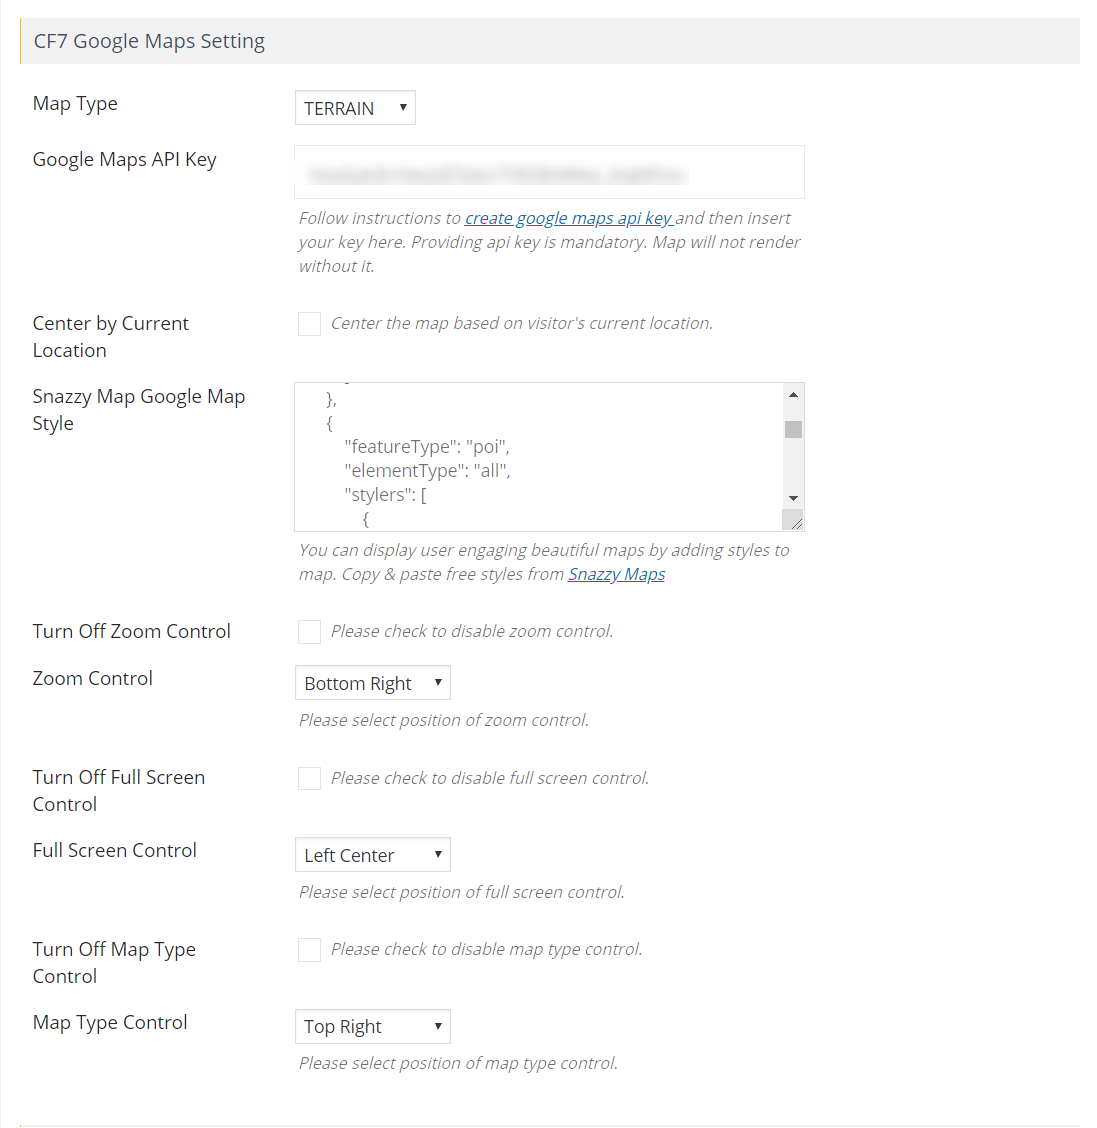
CF7 GOOGLE MAPS SETTING
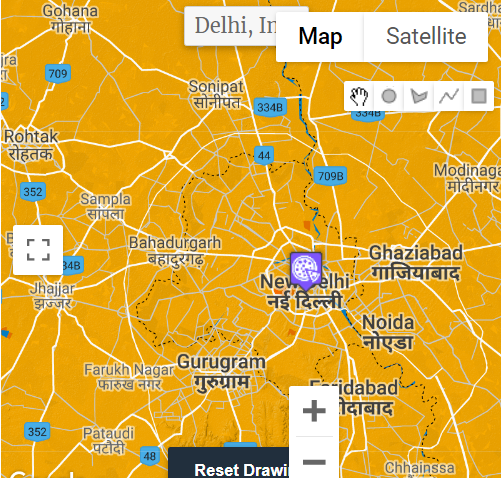
- Roadmap – displays the default road map view.
- Satellite – displays satellite images.
- Hybrid – displays a combination of normal and satellite views.
- Terrain – displays a normal street map based on terrain information
MARKER SETTINGS

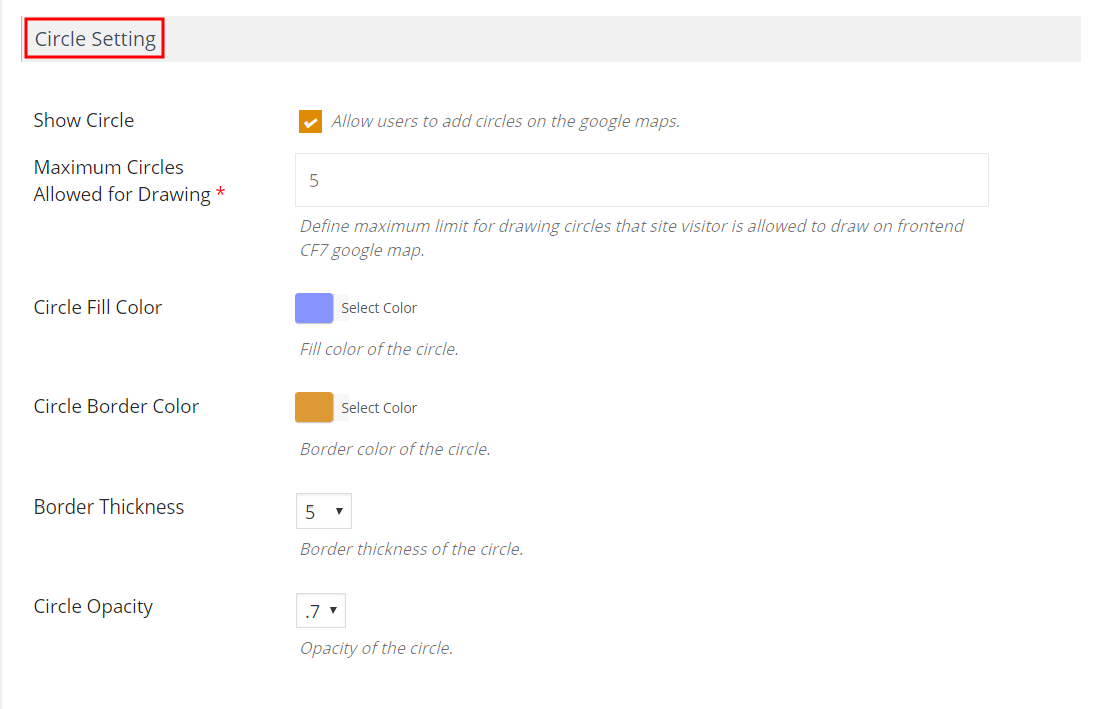
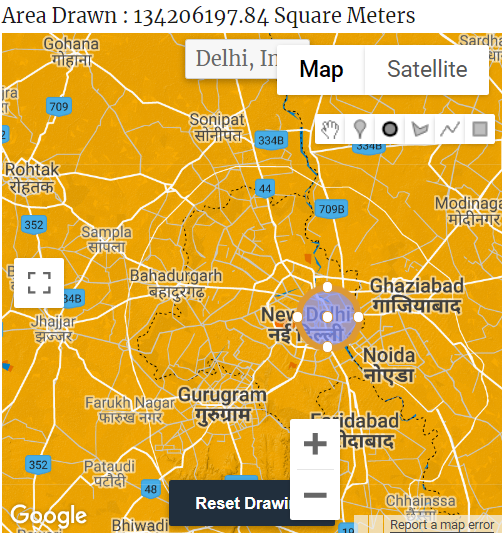
CIRCLE SETTING
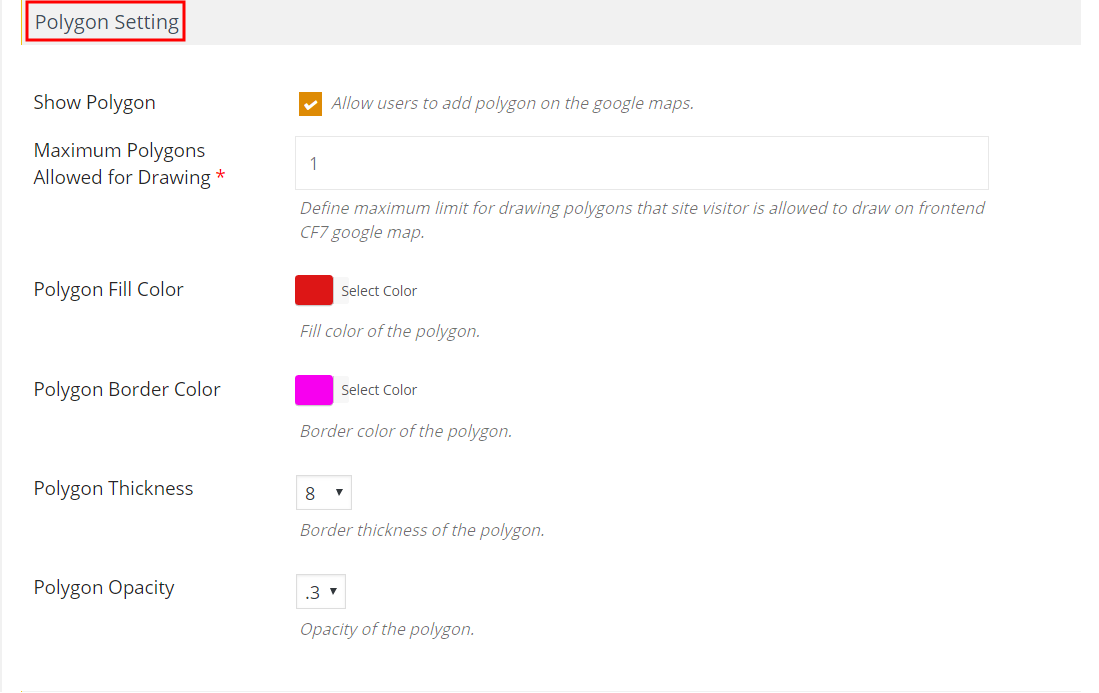
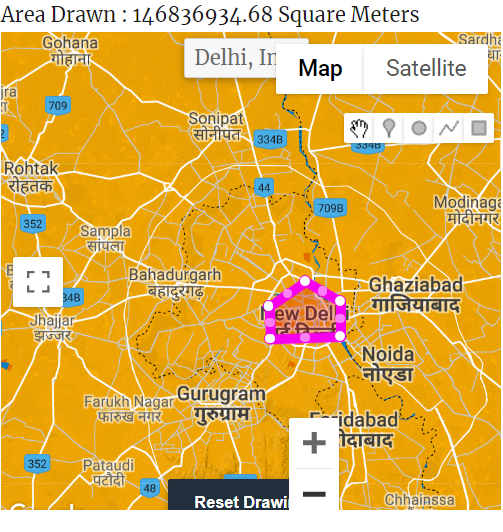
POLYGON SETTING
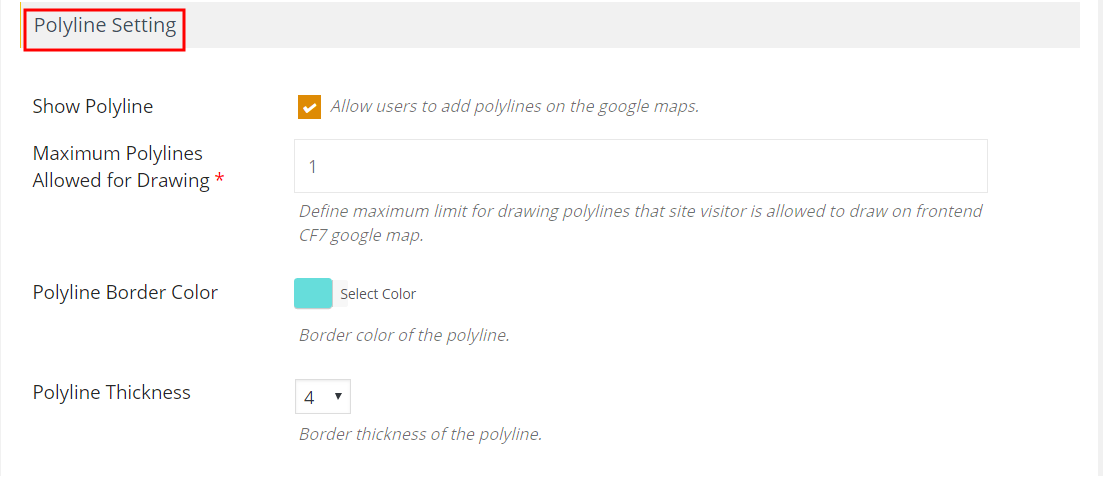
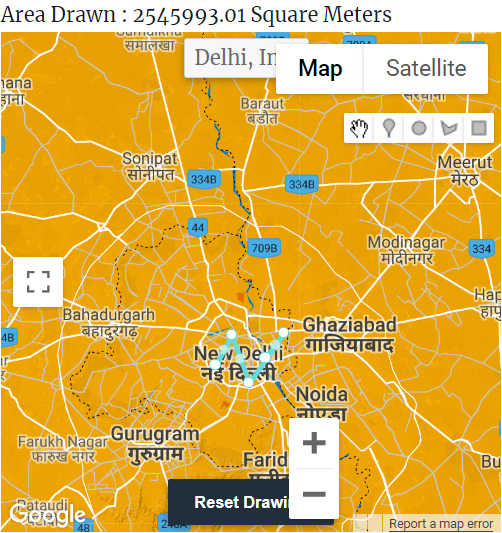
POLYLINE SETTING
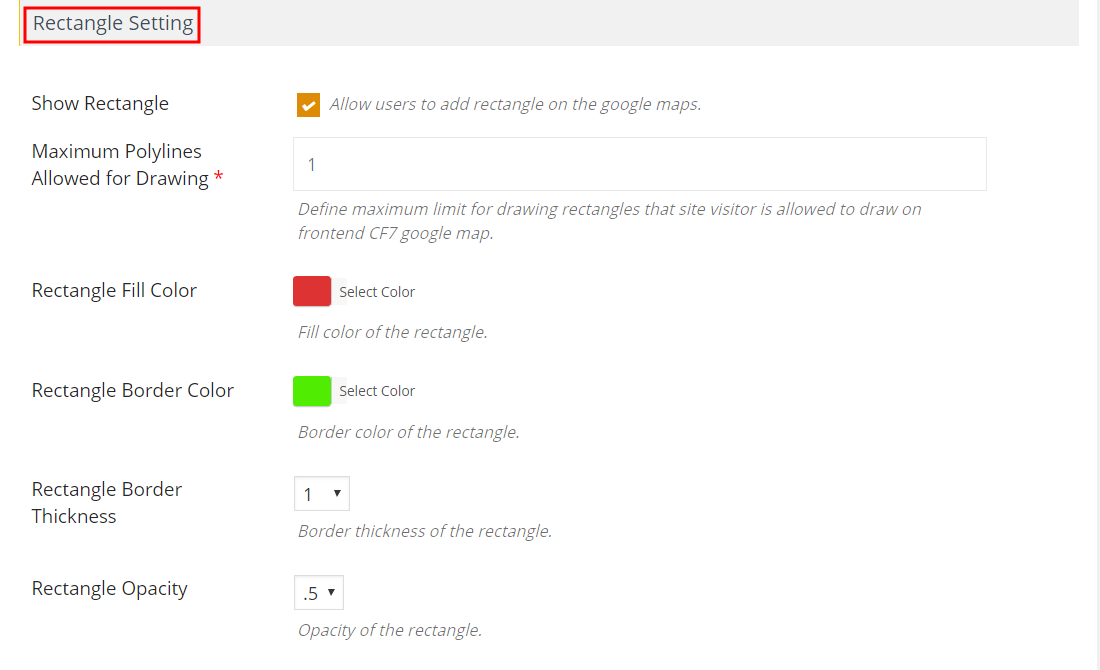
RECTANGLE SETTING
Click on save settings.
CF7 CONTACT FORM PLUGIN SETTING
For displaying a map on front-end CF7 form, You will first need to integrate it along with other form elements from the backend.
- 1Go to contact menu
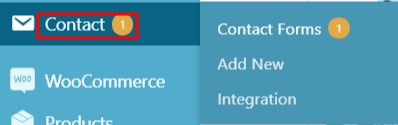
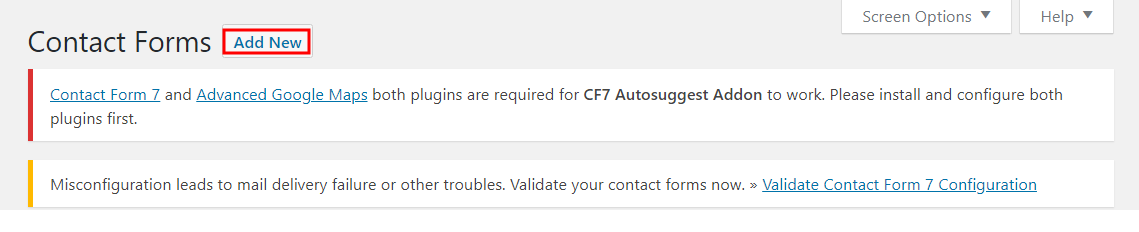
- 2 Go to Contact Forms Add New.
- 3Now click on Google Maps menu as shown.
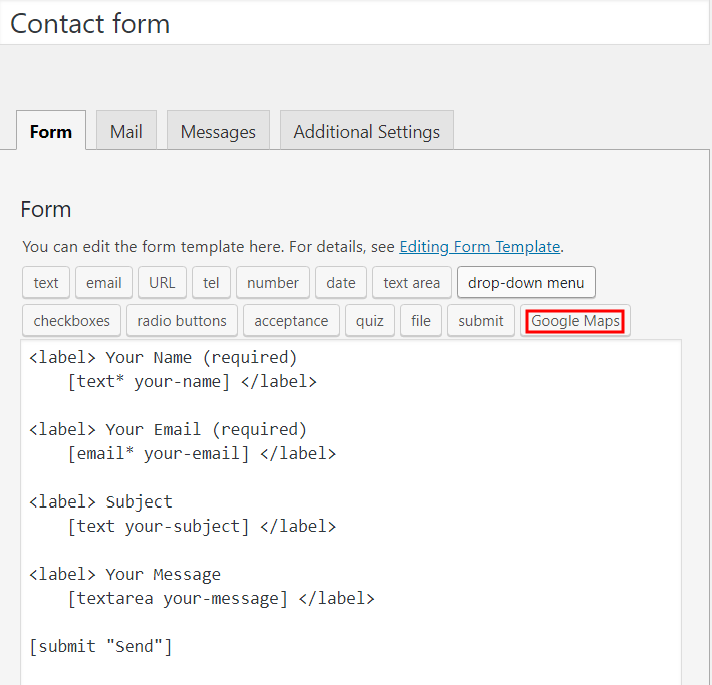
- 4Copy the Short-Code given in Form-tag Generator: Google Maps window.
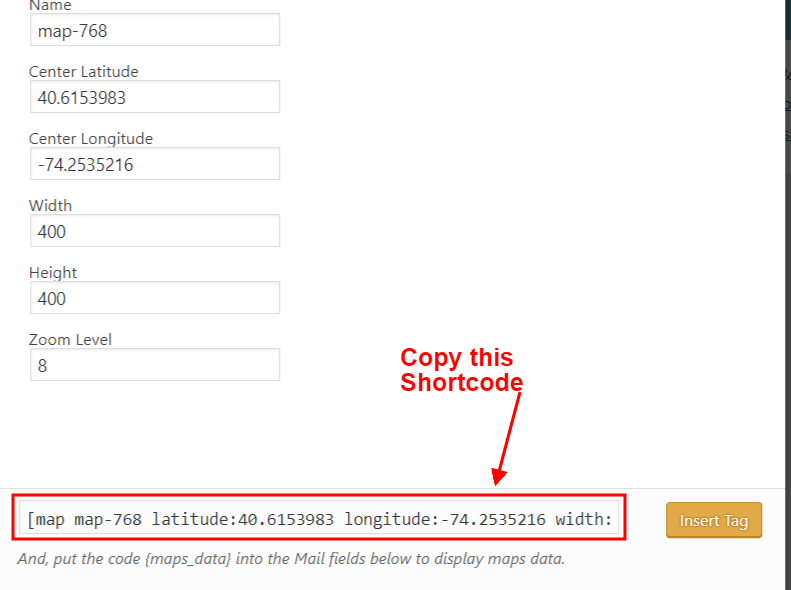
- 5And paste the Short-Code in contact form text area.
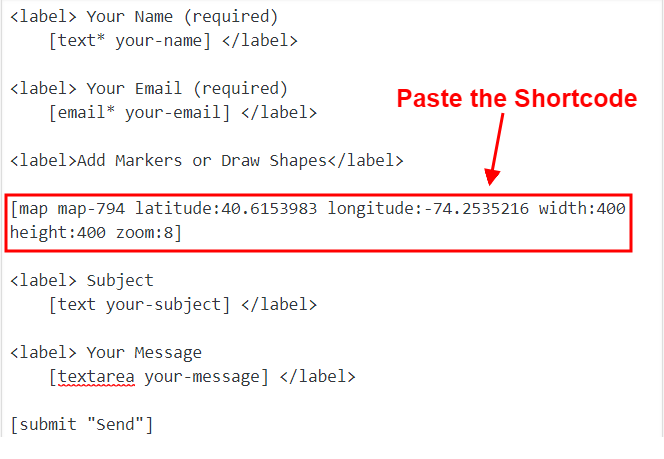
- 6Click on Save button or Update button.
EDIT MAIL SETTING
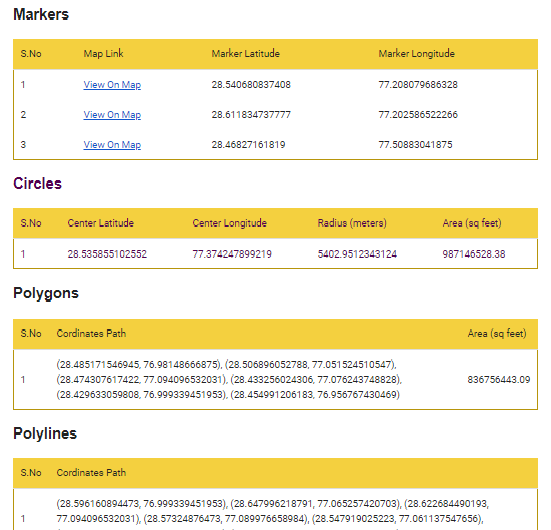
Put the shortcode{{maps_data}} into the ‘Message Body’ field in ‘Mail’ tab. This shortcode is used to send markers and shapes informations in the email body.
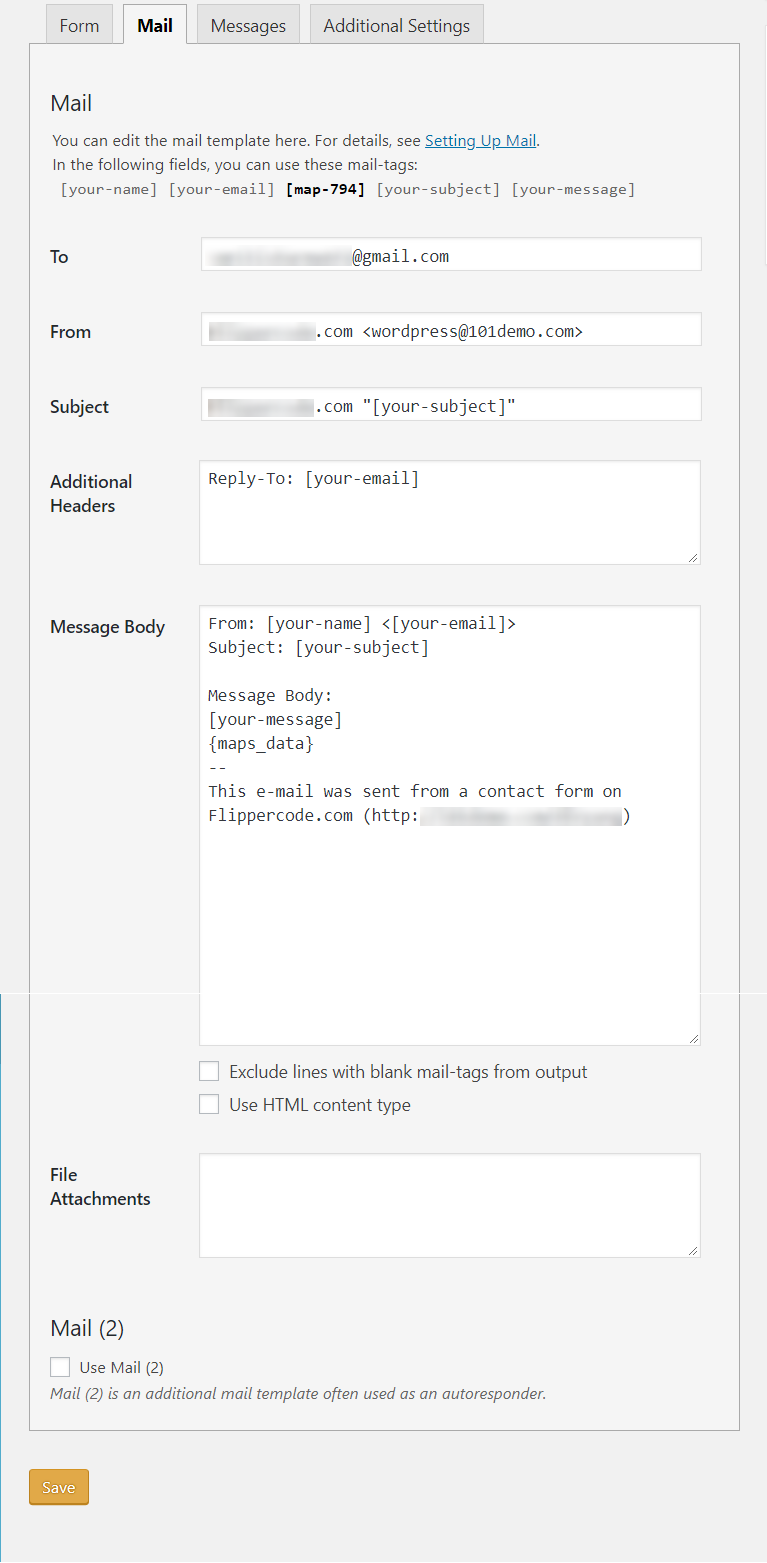
Here’s what each field means:
SHORTCODE
- 1Go to Pages menu.
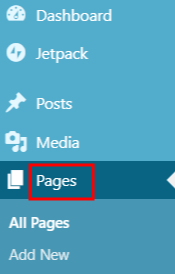
- 2Click on Add New button.

- 3Click on Add Title.
- 4Add Shortcode.
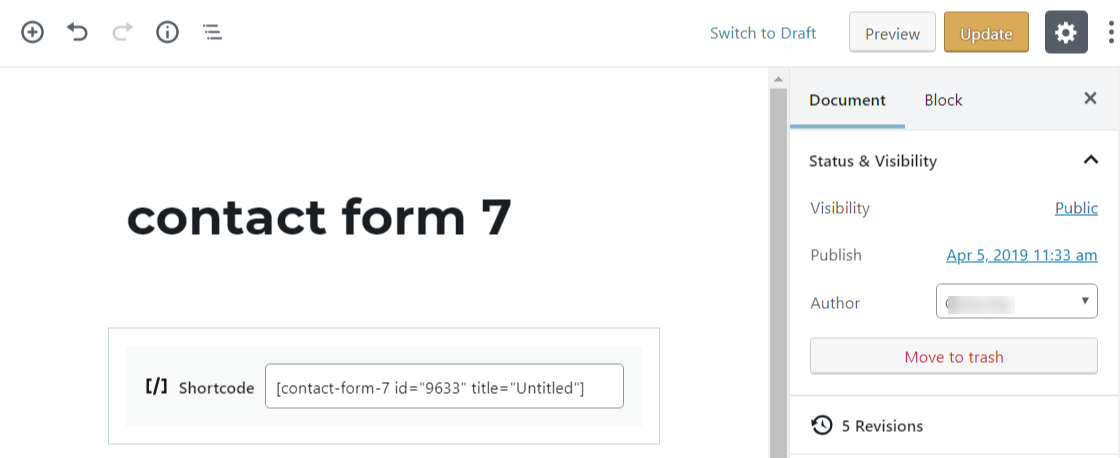
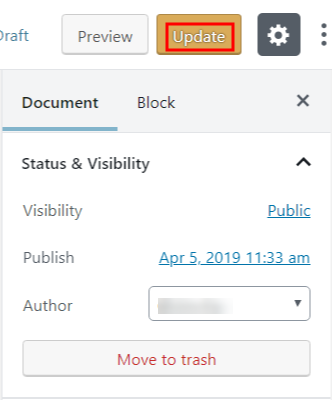
- 5Click on Update button.
- 6You would then see a contact form displayed on the frontend of the site.
How to get user’s input in Email?
A user can get his input in email. Here some easy steps are given to get input in email.
 Follow the steps to get email:
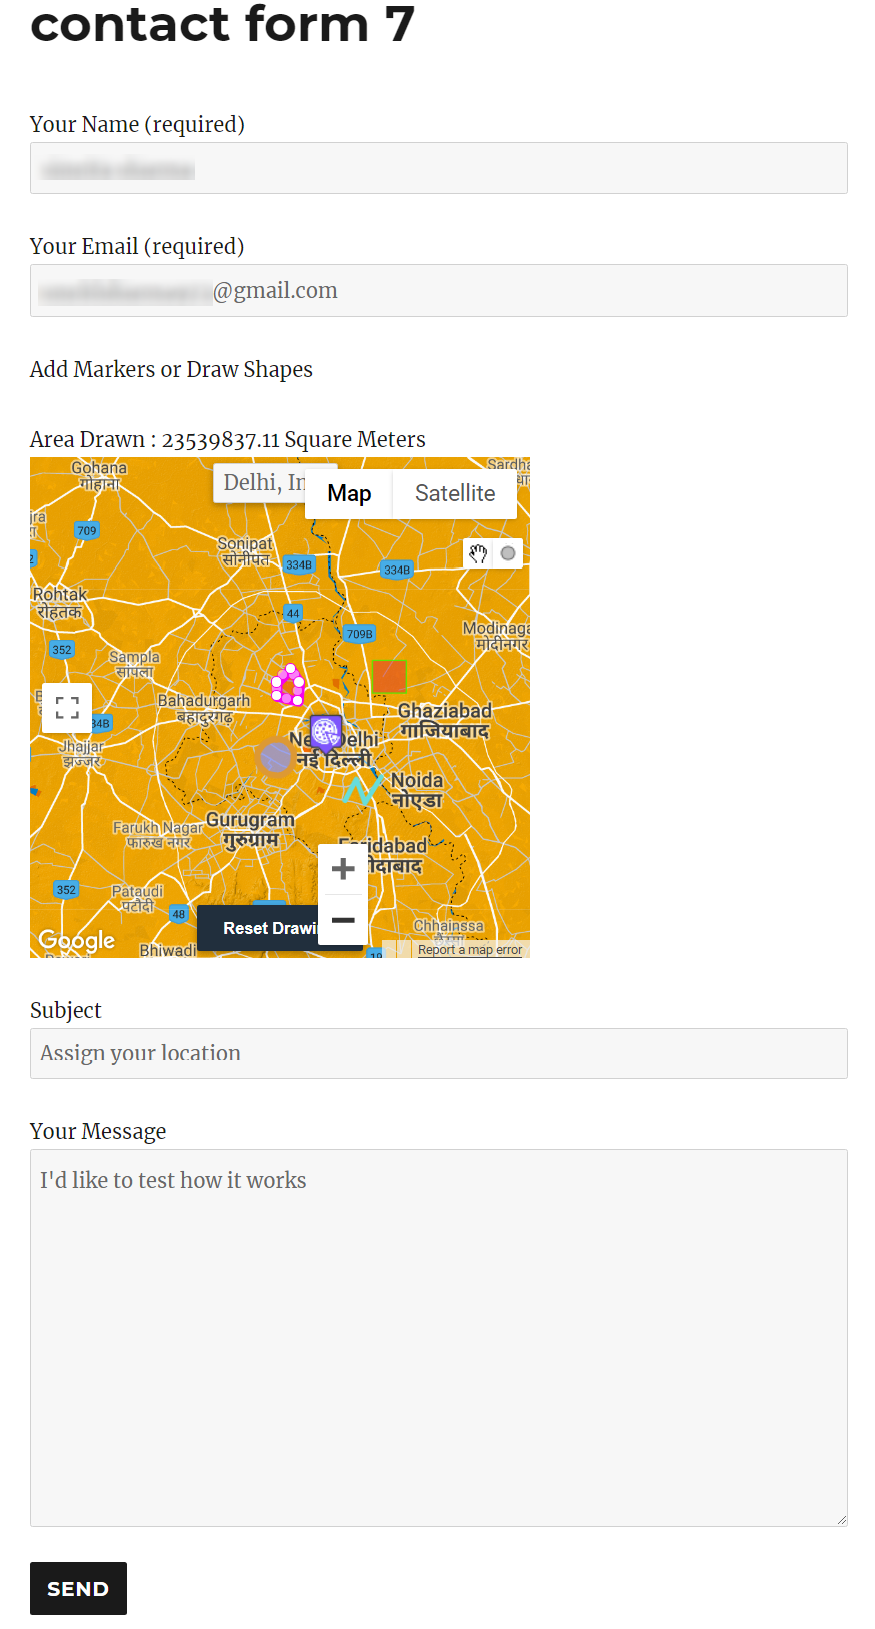
- 1Insert your name.
- 2Insert your email address.
- 3Now assign your location.
- 4Give a subject and type your message
- 5Click on Send button.
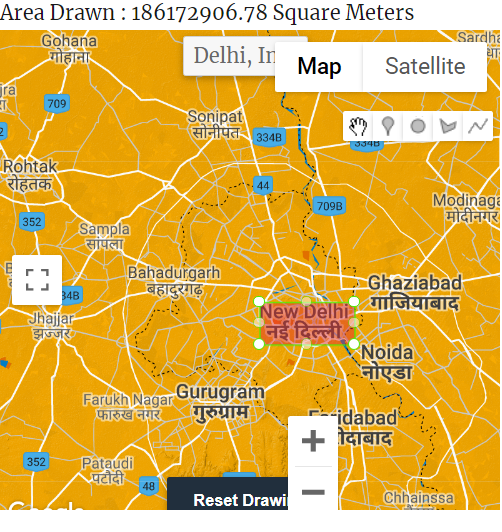
“Receive User”s Input in the Email of Submitted Locations.
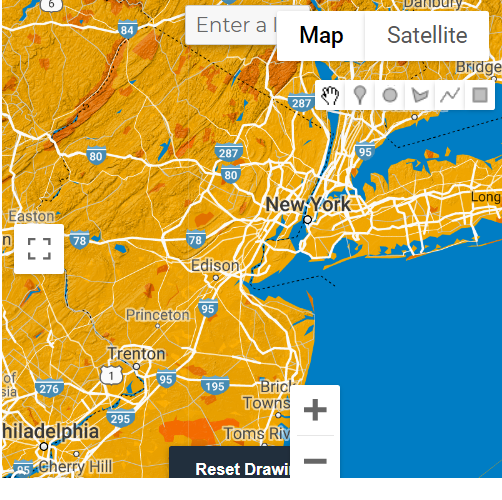
You can view location directly On Google Map